On my previous engine--part 1 post, I stated my concerns over a siezed up engine and whether it would be salvageable, especially since it is numbers matching. The top end tear down was encouraging as the lifters were not sized in the bores and were actually in pretty good condition. Likewise on the initial look inside the bottom end after removing the oil pan.
Now it was on to the next step: dismantling the bottom end. The first thing was to pull the front cover, cam chain and sprocket, and associated parts. The cam was reluctant to slide out. So I made a tool that attached to my slide hammer to give it some "encouragement". Once the front cam bearing cleared the block, the rest came out with no issues. For 89K miles, it didn't look too bad. None of the lobes had uneven wear.
Next, it was flip the block over on the engine stand and remove the main crank journal bearing caps. However, before I removed any of the caps, I took my punch set and stamped them according to their journal and cylinder number. You never know if things can get mixed up, especially at the machine shop.
After removing the main capes, I was fairly please with the condition for the miles and considering the type of oil that was available. There was normal wear and the main journals looks great. No grooves or scratches.
 |
| The main crank journal caps from front to back. |
 |
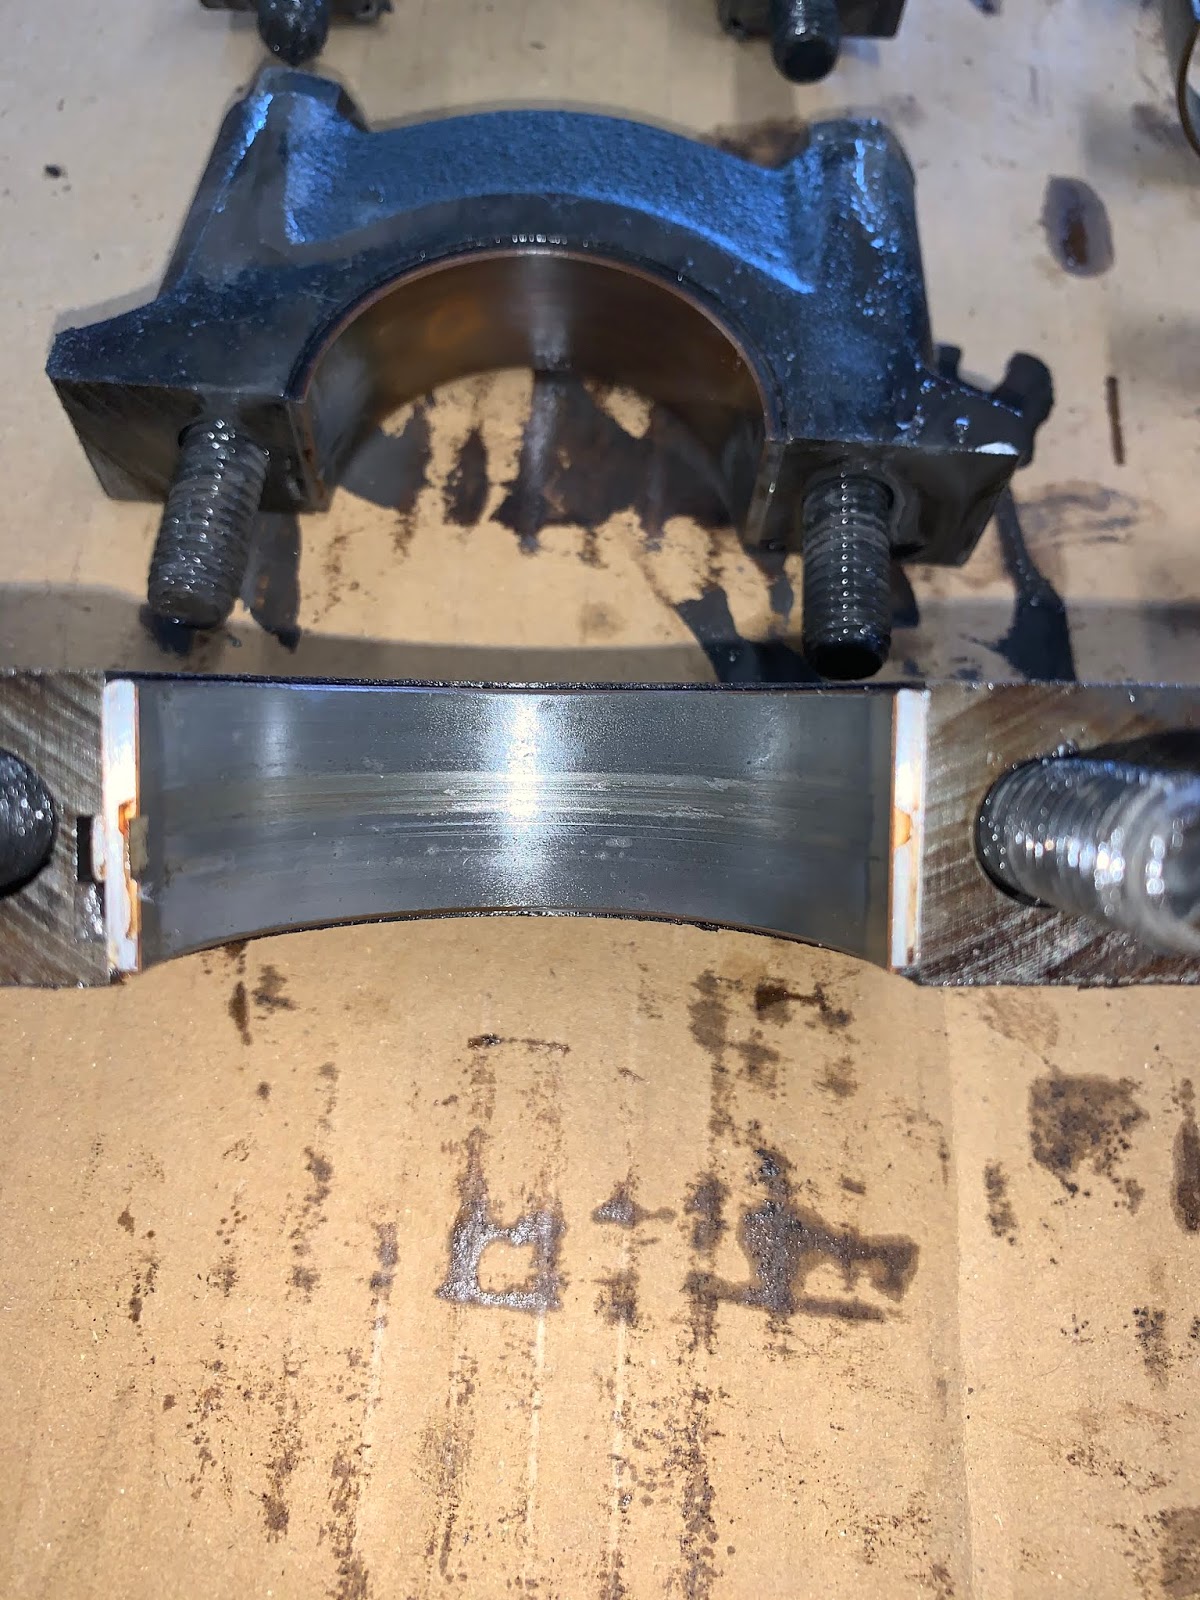
| This was the front main journal bearing and showed the most grooving. |
 |
| This is the center main journal cap with the thrust bearing surface. |
I proceeded to remove the rod journal caps. With the pistons seized in the cylinders, I was hoping I could get all of the rod cap nuts loosened. Unfortunately rod cap #6 had a nut that was unreachable with a socket, boxed, or open end wrench. What to do? I decided to try and lift the crank out to see what happened. Low and behold, the rod rotated around so I could get to it. Yay! The crank was out!
 |
| The crankshaft looks good with no scoring or scratches. |
I replaced the rod caps on their respective cylinder to keep everything together Now it was on to the part I was dreading: removing the pistons. I wiped out the crud from the cylinders. The one thing I did discover after removing the crankshaft is that 6 of the 8 rod and piston assemblies could be rotated in the cylinder! That meant the rings were the only thing that were seized. I had been spraying PB Blaster into the cylinders after removing the heads. Hopefully that would help in the process. I thought I had nothing to lose by trying to break the pistons free. With a short length of 2"X 4" and my dead blow hammer, I started on #1 cylinder. The piston broke loose on the 3rd blow. I drove it down into the cylinder far enough so I could get my ridge reamer in the cylinder. I did that with all the pistons. However, #6 was not going to cooperate. That one I'll deal with later.
There was a carbon ring built up on the top of all the cylinders but no metal lip. That's good.
 |
| The cylinders before cleaning the crud out of them. |
I ran the ridge reamer around all the cylinders to get rid of the carbon ring.
 |
| #1 cylinder after removing the carbon ring |
With the pistons broken loose, I sprayed a coat of PB Blaster on the cylinders and used my dead blow hammer on the rod caps to drive the pistons out the top of the cylinders. Overall, the cylinders were in good condition with no scratches or galling along the bores.
With the exception of cylinder #6, the engine was now torn down and ready for the machine shop.
 |
| Pistons and camshaft laid out in their respective order. |
Now I need to bag, tag, and box up the front cover and associated parts along with the oil pump. Even though the fuel pump, oil pump, and cam chain and sprocket will all be replaces, it's good to have everything organized to help with reassembly when the time comes.
 |
| The engine all laid out ready for tagging. |
With the "stay at home" order here in Indiana through the end of April, I'm not sure the machine shops will be open. I'll make the call next week to find out. After all, they could be on the list of "essential businesses". Not only that, they could probably use the business.
After I finished up with the engine teardown, I had to get some home chores done like cutting the grass before the rain moves in this weekend. When I was done, I discovered that UPS left a gift for me on my front steps. Yes! The cam kit arrived from Jegs. This is a complete kit with cam, valve springs, seals, keepers, timing chain, and timing gear. (The rocker kit, with roller tip rockers, pivots, and pushrods is coming next week,). So the entire top end of the engine will be brand new as it should be.

I went with a flat tappet cam for various reasons. The big one was concern over the lifter bore wear that I was reading about on blogs. The bores in my '68 block aren't as long as the '85 and up roller 5.0 engines. Running a small base circle roller camshaft (I know I'm getting technical here) puts an excessive side load on the lifter bore and can prematurely wear out the bore, destroy the lifter, and hence, do some serious engine damage. Not only that, this kit was on sale for 20% off and costs $380. A small base circle camshaft would be $349 AND the lifters would be another $400. That didn't include all the other goodies. So funds did have some bearing on the decision. Yes, I'll have to put a zinc additive in the oil, but I figured this type of cam worked in the engine before. So don't mess with success.
I've got a pretty good mess now in the garage I need to clean up. After that, it's back on to the bodywork. I still need to align the driver's side door and fender to get the gaps and body lines correct. Then it's on to the filler and fixing any dents that appear. Progress... slow... but still progress.
Until the next time...


