After taking a diversion to get the engine apart and evaluated, I'm back at body work again. So, I'm picking up where I left off at part 1.5.
The door and fender gaps and alignment on the driver's side weren't where I wanted them to line up. So I began that process of taking things apart and putting them back together properly. But in the process, I noticed the hood was off-center about 1/8" toward the driver's side. Readjusting the hood from left-to-right did little to help.
Then I noticed that when the hood was up, it was in alignment with the cowl. But as I lowered it, it shifted to the left. I noticed that the hood hinges, which are from a '68 convertible, weren't straight when looking at them front to back. That needed to be fixed and might be part of the hood shifting problem. I pulled the hood, with the help of my friend Eric (who is an ex-Marine) and took the hinges off.
There was some play in the factory rivets and press fitted joints. I used my bench vice and a ball peen hammer to attempt to tighten them up. I also used a pry bar to straighten out the alignment of the hinge brackets so they were parallel to each other.
After installing the hinges and the hood again, I ended up with the same result but it was only 1/16". I'll have to mess with it some more. I really don't cherish the thought of buying aftermarket hinges as most of the parts require some sort of rework. I'd rather deal with the originals and take my chances.
We moved on to the door gaps and got them adjusted easily. The front fender needs some tweaking, but considering these are all original factory 1968 panels, it's only going to be so good. But I can live with that. This isn't going to be an uber pro-touring car but a very nice factory restoration. No Concours either as I plan on driving it...hopefully a lot!
 |
| Door and rocker panel gaps are now consistent. |
 |
| Fender to door gap is a little wide but will be adjusted at final assembly. |
 |
| The body highlights and reveals line up nicely. |
After the hood, door, and fender work, we moved on to attach the new rear valance with the appropriate body screw/bolt kit. Of course, it needed a little "adjusting" with the help of a 2" x 4" and a mallet.
 |
| Rear valance installed and appropriately adjusted for fit. |
 |
| The rear valance will require almost no bodywork. |
The front valance was next. This is one of two that I got with the fenders. It's in better condition but has a few kinks that need to be worked out. I'm still weighing whether to try and bodywork it on the car or take it off and bench work it. I'll strip it first and make a decision then.
Then my friend and I "divided and conquered" on bodywork. I put him to work with the DA sander and a red Scotch brite pad to clean the quarter panels and give them a slightly rough surface for the body filler to bond better. As soon as Eric finished the driver's side rear quarter panel, I started the application of Everlast Rage body filler. It's a high grade filler that really performs well. I've already metal worked the quarter panel so that there will be no more than 1/16" of filler at the most.
 |
| This is the panel after the first application of filler. |
 |
| My friend Eric working his way around the rear to the right side. |
Here is the left rear after two applications of filler. You can barely make out where the two layers overlap.
The trunk lid is one that I got as an older replacement part. I went through getting this one on
this post. There was a little "garage rash" in the form of a small ding that happened while moving it around the garage and storage unit. Fortunately, it was in an area I could get to from behind. A few taps with my large head body hammer and flat dolly and it was good to go. A small skim coat of filler completed the repair.
The trunk lid is ready for high build primer. Eric worked around the right rear quarter panel and then worked on the passenger side door. All-in-all, most of the body is ready for filler work.
 |
| The e-coating on the trunk lid is prepped for primer. |
One dent in the body that has been vexing me is this one in the top center of the rear window sill. Something managed to hit it on the edge and pushed it up and forward. How in the world this happened and not break the back glass or damage the trim is beyond me. This dent was also not easily accessible from inside the car. I tried the stud welding gun but was not able to really get to the area I needed, though it did help some.
I resorted to a 2" wide by 1/4" thick steel strip I had that was 2 feet long. I bent it in a contour to match the roof. Then I slid it between the roof skin and the roof support structure. With the 10 pound hammer, I was able to hit the metal strip without adding a dent to the roof. It did push out the "pucker" that was there. As this point, it's about as good as it's going to get. I'll put a coat of Metal-to-Metal on it followed by the Rage filler.
We had put in a fairly full day and accomplished quite a bit. I'm hoping to set up another day for Eric to come over. If I can teach him to apply filler and sand it out properly, it would really help move the bodywork closer to spraying the high-build primer. Then the fun work of sanding and sanding and sanding begins.
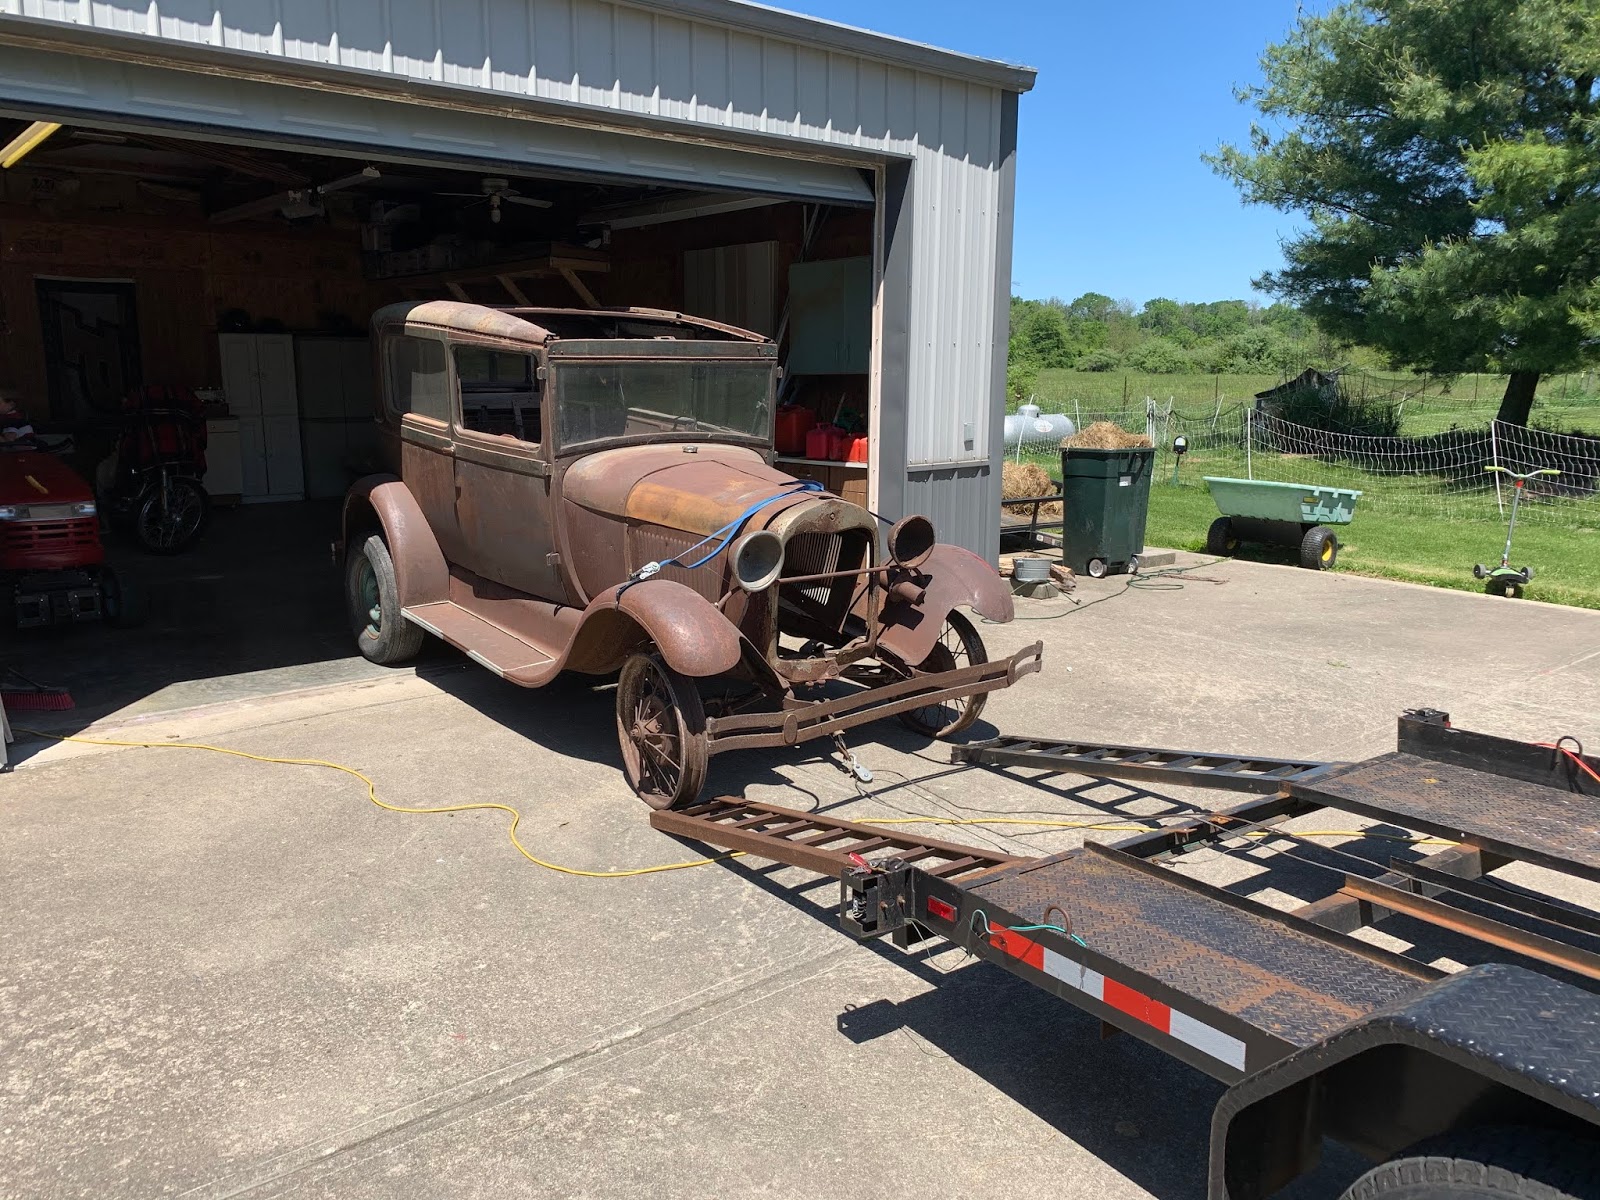
Oh... One more thing: I sold my 1929 Ford Model A. It was a bittersweet moment, but it will provide a nice cash infusion for the Mustang's engine, transmission, and rear end restoration.
By the time you read this, it should be at it's new home in Florida. That Model A has almost traversed the entire north-to-south distance of the US, starting in northwest Minnesota and ending up in south Florida. Oh well... maybe another time.
Until the next time...


