"Now is the winter of our discontent." Shakespeare was on to something. Or maybe not. I can't blame the unbelievably harsh winter in the Midwest for my lack of progress on the fastback. However, I have had my excuses or diversions. Some of them are legitimate. Others may not be considered so by the nature of the diversion.
As many of you know, I'm a private pilot. I have shared some of my flights on this blog. I can't explain what it's like to bore through the sky from 125 to 170 miles per hour depending upon what club airplane is available. This extravagance is what allows my wife and me to be able to visit our kids and grandkids long distances away from where we live in central Indiana. Our youngest and her husband are soon to be residents in the DC area as my son-in-law will be a resident pathologist at Georgetown University Hospital in July. (Can you hear my buttons bursting in pride?!?!)
So now I will have two out of three of my children's family living 450 nautical miles away from where I live. Did you notice the distance reference? Nautical miles? Yeah. We're talking flying miles. So how can I afford to do trips east and west as often as I want to...and my wife as well? It's an easy answer.
Become a commercial pilot...a pilot who gets paid to fly aircraft.
Yup. I have started my training in February since January was colder than any person or mechanical device was meant to endure. The reason? To become a flight instructor on the side and to help subsidize the cost of visiting our far away family. I Can't drive from Indianapolis to DC in 3 hours and 30 minutes.
But I can't afford financially or time-wise to spend it all in the air. I need to be able to enjoy the ride to the airport and back home, not to mention the Sunday-go-to-church drive, right?
Enter the fastback. She's been a part of our family for far too long to cast aside for the likes of flying. After all, that is the reason I bought her 9 years ago. But that's another story.
So let's get down to the business at hand.
I went through a basic garage arranging/cleaning yesterday in preparation for the work today. The lawn and other household duties were completed as well. After arriving home from my Sunday obligations from church, I took time to grab a bite to eat while watching the 27th Spring Fling Mecum Auction in Indy this weekend to drool over some of the muscle machines crossing the auction block. Some if not most of them were way outside of the budget. Others were tempting. But I already have a jewel in the rough in my own garage. Why buy another vehicle that doesn't have the connection I have with my Eleanor?
I was determined that today I was going to get back to productive work on her. She's been patient with me. The least I can do is show her some love.
The plan is to get all the body panels prepped for repair. That includes fenders, hood, and trunk lid with the goal of finishing up any body work and then primer. You already know the trunk lid story. The right front fender was prepped--at least on the outside surface. I have been contemplating how to deal with the inside surface that has a combination of surface rust and factory undercoating that's harder than nails. Part of me though if it's that firmly attached, don't mess with it. Another part of me said take it off and don't scrimp. That part won.
It was a beautiful clear and calm day. I elected to dig out my media blaster and use that for the dirty deed. I also got out the left front fender figuring that if I was going through all the set up for one fender I might as well do them both. It's that killing two birds with one stone but fenders instead of birds.
First thing was to get the media ready. I have a bag of fine grain "Black Beauty" and a 5 gallon bucket of the same that I swept up from the body shell blasting. I did my old trick of using a screen to filter out the large crud and reuse it.

After filtering the media, I loaded up my pressure blaster and set up in the driveway. I spread an old sheet out to keep from doing any more damage to the fender.

Then it was time to attach the air hose, put on my blasting hood and mask, and have at it. I had the material flow choked down and angled the spray nozzle at a 45 degree angle and kept it moving so there was no heat buildup that could damage or warp the fender. It cleaned up nicely, but there was still some of that undercoating that wouldn't budge. I'll deal with that later.

The blasting got into some of the nooks and crannies around the headlight bucket that would otherwise be hard to get to. I also have a relatively clean surface to apply Zero Rust when the time comes.

I elected to go ahead and blast the outside of the fender instead of using the stripper on my 4" grinder as I did on the right fender. Again, I was careful not to cause any heat buildup.

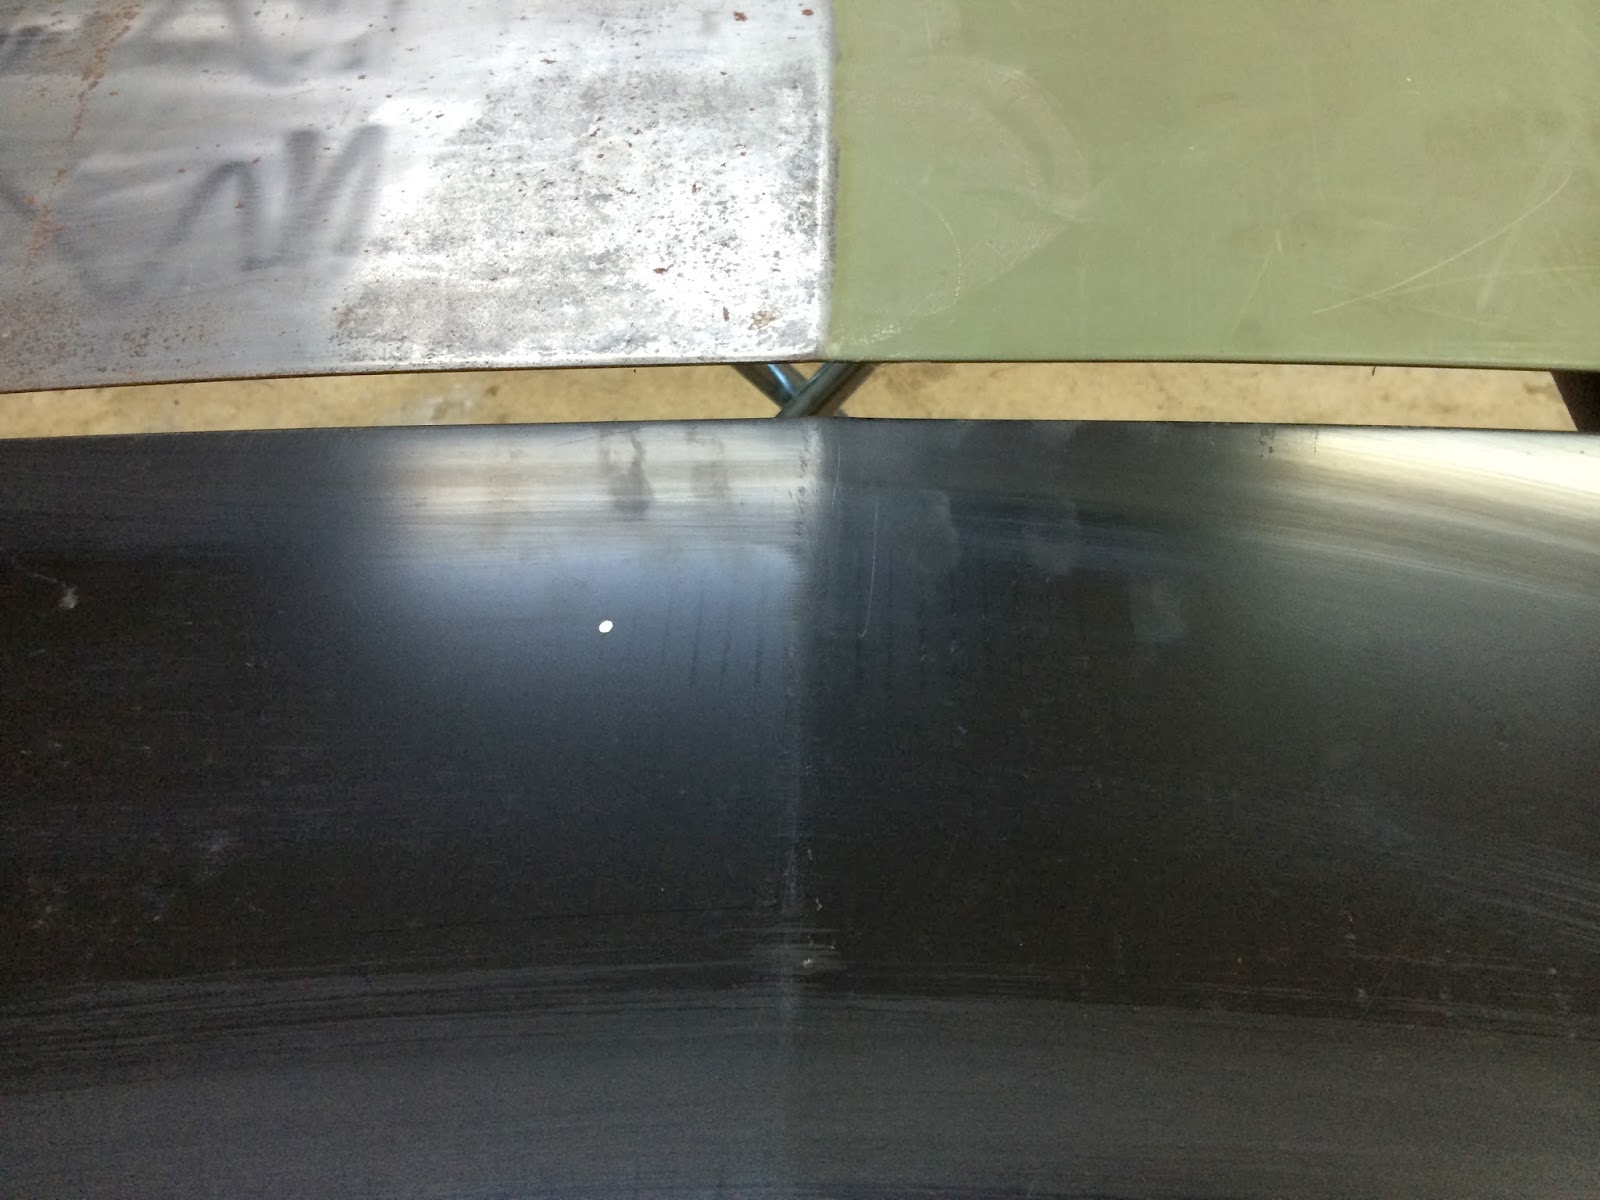
As you can see below, it cleaned up nicely. Some of the surface rust didn't completely come off. I'll use either my stripper or DA sander to clean it up.

The top rear and edge of the fender had some of the more stubborn surface rust.

Now it was on to the right front fender. I had already stripped the outside as my previous post described.

I previously started cleaning the inside of the fender with a braided wire brush, but it was a messy process creating black flecks of the undercoating that flew all over the place. So the inside of this fender became a media blasting candidate, especially around the headlight bucket and the top inside.

After the process, it cleaned up fairly well but still left some undercoating on the top inside surface. And just like the left fender, there is surface rust that has the scale cleaned off, but it will need to dealt with.

The headlight bucket has residual undercoating as well.

Overall, I'm fairly satisfied with the results and both fenders are much cleaner than I could have done with any other mechanical method. Now it's on to removing the undercoating.
I recall from one of my fellow Mustang bloggers that a heat gun would work well to heat the undercoating up and then scrape it off with a puddy knife. I picked up one at Menards that was on sale. I figured I didn't need one with all the bells and whistles. With the left front fender on the body panel stand, the heat gun in my left hand and the puddy knife in my right hand, I began the task.
I was pleased with how quick and easy it came off. I was not so pleased with the residue left behind.

I tried laquer thinner to remove it. It didn't work well and it would have taken quite a bit of time. I was out of acetone. Bug and Tar remover didn't even put a dent in it...no pun intended. I got out my 9" grinder with the nylon brush and it cut through it.

However, I noticed that with the black undercoating removed, the pattern was still visible. Upon closer inspection, I discovered it wasn't more residual undercoating but rust that formed under it.

I am now convinced that ALL undercoating has to come off all the body and panels. Otherwise, there will be this dormant rust waiting to rear its ugly head down the road. I used my 4" grinder with the stripping pad on it to see how well it would work to clean up surface.

That is what you call clean metal. So this will be the process though a bit tedious to clean up the rest of this fender and the right front one as well. I'll have to do the same thing on the inner fender and wheel wells on the body.
I continued removing all the undercoating with the heat gun. The rest of it came off without a hitch.

The headlight bucket was a little tricky because of the rounded surface and it had some between the bucket and fender surfaces.

After that, and upon closer inspection, I noticed that all was not well in fenderland. Wanna guess?
Yup. Rust. Pinhole rust.

And of course it had to be in a difficult location to repair. A view from the inside of the bucket with the back lighting shows the half dozen spots. Bugger.

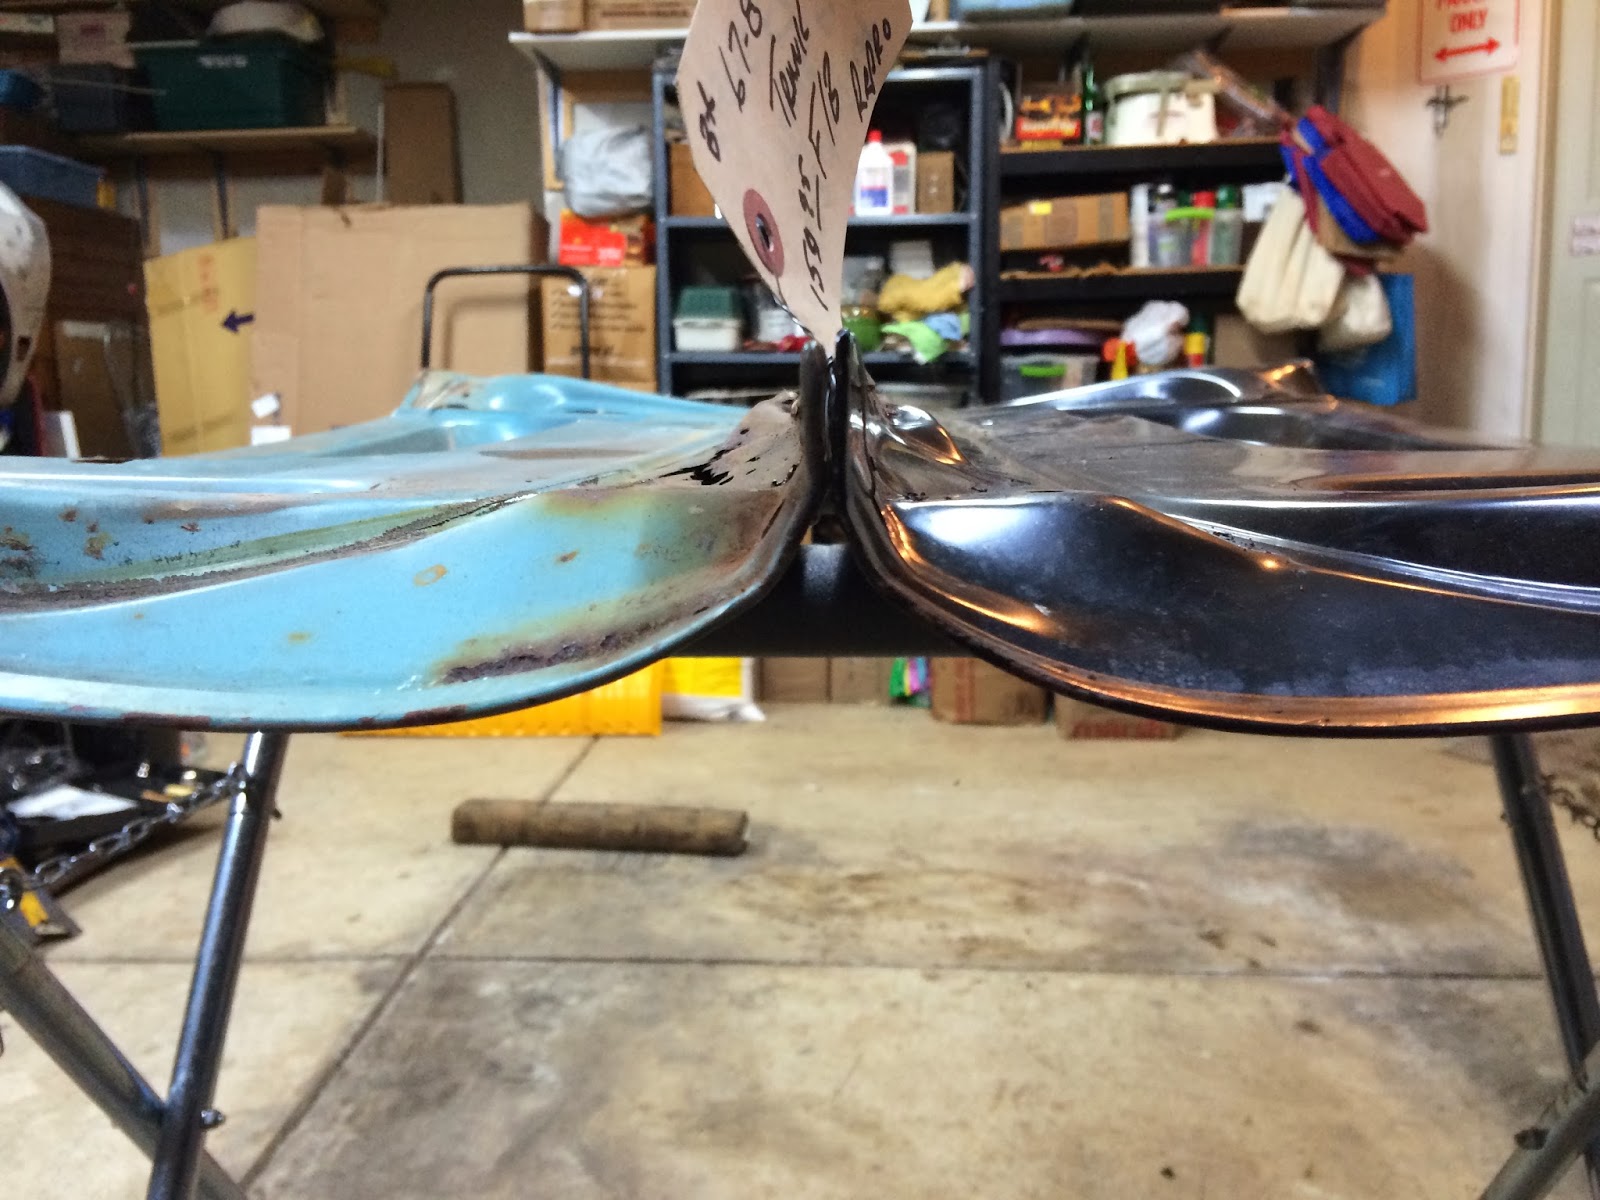
It was time to do a closer inspection of both fenders. I got them off a 68 convertible a guy was parting out. I paid $90 for the pair that included literally everything... headlights, trim, bezels, etc. So I can't really complain. But I would hate to have to abandon one or both for a replacement panel.
My major concern was rust back behind the bucket and fender. If the bucket was rusted on the back, there could be more elsewhere. I was relieved to discover that there wasn't any other rust that would need to be cut out and replaced. It was really clean around the bucket to fender flange on the side of the fender.

Along the top of the fender, there is some pitting, but it's not severe. The flange there also looks good. you can just make out one of the pin holes in the photo below.

I'll come back and sort out how I'm going to repair the left front fender. The right one was OK.
I wanted to see how that surface rust left after blasting would clean up. I got my DA sander out and gave it a quick once over. The coarsest pad I had was 80 grit. It took some time and finesse, but it cleaned up pretty good. I also discovered a few more small dents and dings that will need to be worked out.

I also found rust on the rear lower corner of the left fender on both the inside and outside. The inside will be a little tricky especially since it will involve prying up the flange of the outside skin.
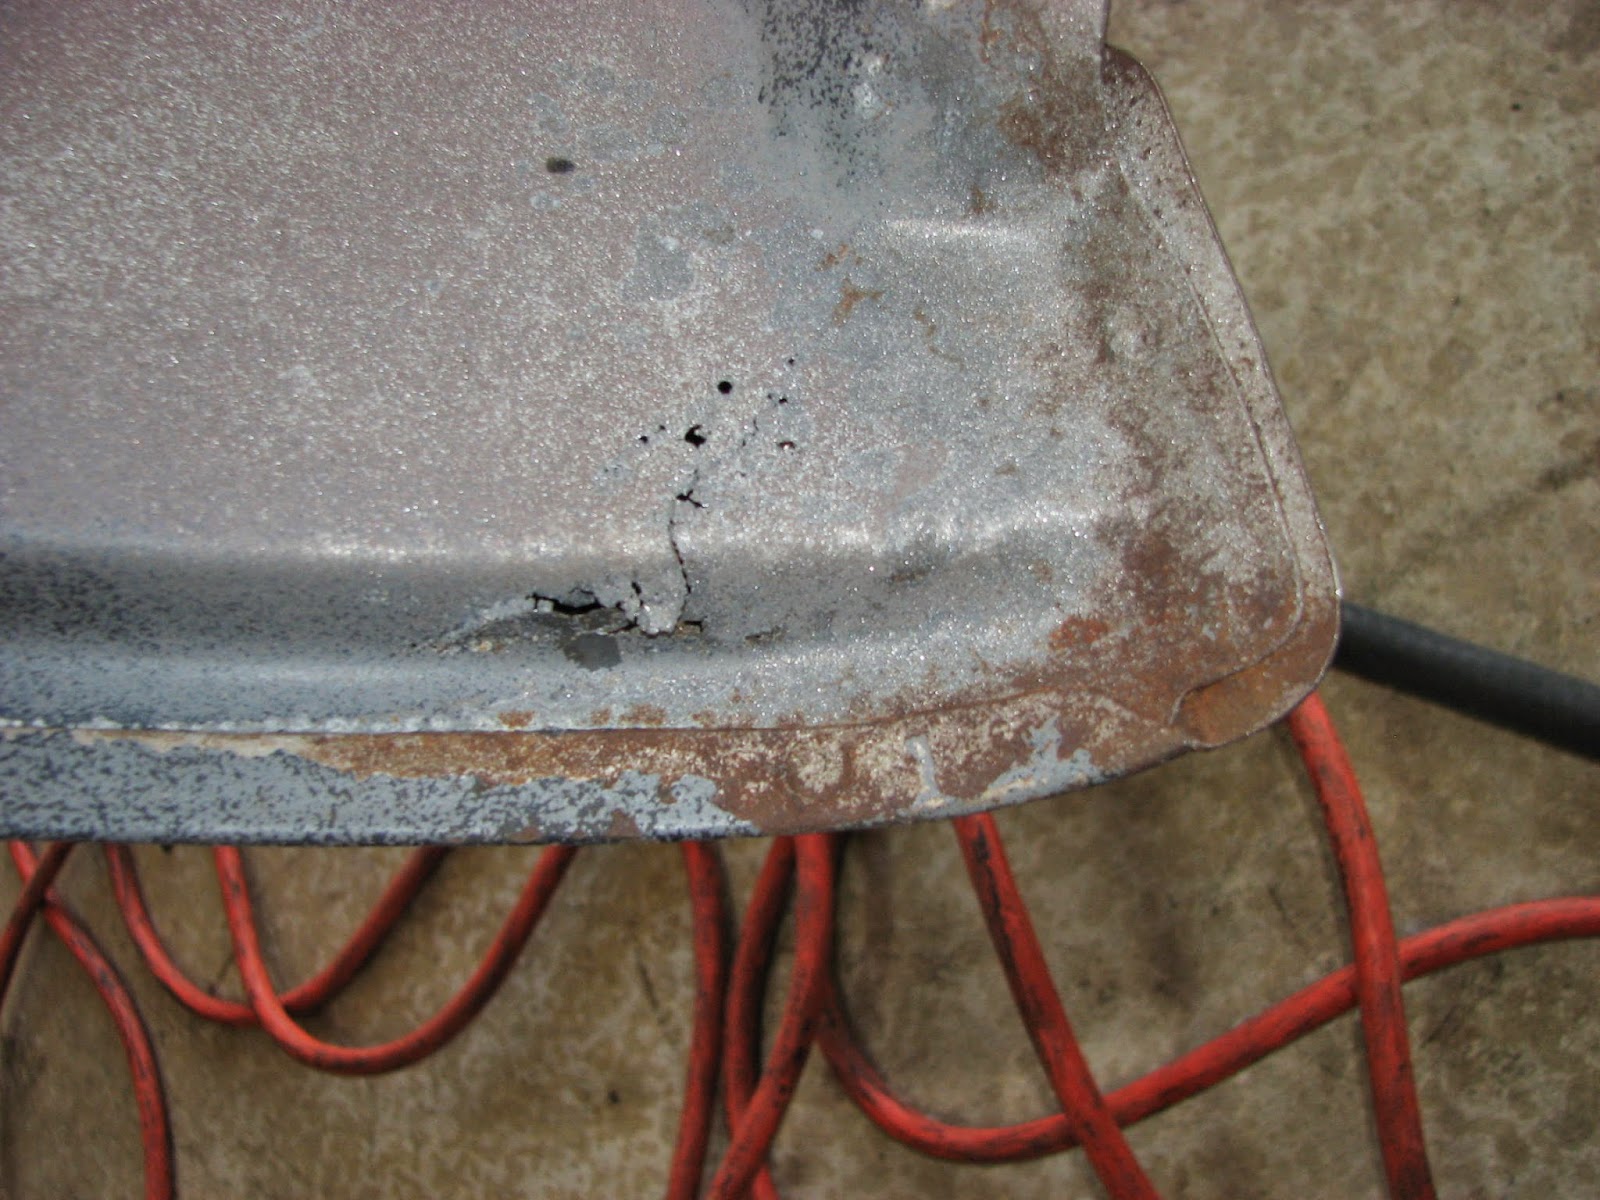
The outside will be more of a straight-forward patch. That will be the first one I'll do so that it will allow me to inspect the back side to determine how extensive that repair will be.

I've had lots of practice making weld patches and repairs. So this will not be anything I haven't had to do before. I hung both fenders on the panel stand. The right front is definitely more solid in the headlight bucket area. The left doesn't look so bad here, but I can't leave it that way.

That was all the work I was going to get done, especially since I had a blasting mess to clean up out in the driveway. While doing that, a thought hit me about the left fender repair. I still have the original fender that came on the car. Granted it's got a tear in the wheel lip, and a dent in the lower front wheel lip, but the rest of the fender is solid. I realized I have my patch panels already made!
I don't know if I'm going to go through the effort to drill out all the spot welds and remove the entire bucket, or just cut out the rusty section and put a patch in it. I'll have to take a look at it to find out how many welds there are and more important, how the access will be to plug weld the whole bucket in.
That's for another day. Until then....
As many of you know, I'm a private pilot. I have shared some of my flights on this blog. I can't explain what it's like to bore through the sky from 125 to 170 miles per hour depending upon what club airplane is available. This extravagance is what allows my wife and me to be able to visit our kids and grandkids long distances away from where we live in central Indiana. Our youngest and her husband are soon to be residents in the DC area as my son-in-law will be a resident pathologist at Georgetown University Hospital in July. (Can you hear my buttons bursting in pride?!?!)
So now I will have two out of three of my children's family living 450 nautical miles away from where I live. Did you notice the distance reference? Nautical miles? Yeah. We're talking flying miles. So how can I afford to do trips east and west as often as I want to...and my wife as well? It's an easy answer.
Become a commercial pilot...a pilot who gets paid to fly aircraft.
Yup. I have started my training in February since January was colder than any person or mechanical device was meant to endure. The reason? To become a flight instructor on the side and to help subsidize the cost of visiting our far away family. I Can't drive from Indianapolis to DC in 3 hours and 30 minutes.
But I can't afford financially or time-wise to spend it all in the air. I need to be able to enjoy the ride to the airport and back home, not to mention the Sunday-go-to-church drive, right?
Enter the fastback. She's been a part of our family for far too long to cast aside for the likes of flying. After all, that is the reason I bought her 9 years ago. But that's another story.
So let's get down to the business at hand.
I went through a basic garage arranging/cleaning yesterday in preparation for the work today. The lawn and other household duties were completed as well. After arriving home from my Sunday obligations from church, I took time to grab a bite to eat while watching the 27th Spring Fling Mecum Auction in Indy this weekend to drool over some of the muscle machines crossing the auction block. Some if not most of them were way outside of the budget. Others were tempting. But I already have a jewel in the rough in my own garage. Why buy another vehicle that doesn't have the connection I have with my Eleanor?
I was determined that today I was going to get back to productive work on her. She's been patient with me. The least I can do is show her some love.
The plan is to get all the body panels prepped for repair. That includes fenders, hood, and trunk lid with the goal of finishing up any body work and then primer. You already know the trunk lid story. The right front fender was prepped--at least on the outside surface. I have been contemplating how to deal with the inside surface that has a combination of surface rust and factory undercoating that's harder than nails. Part of me though if it's that firmly attached, don't mess with it. Another part of me said take it off and don't scrimp. That part won.
It was a beautiful clear and calm day. I elected to dig out my media blaster and use that for the dirty deed. I also got out the left front fender figuring that if I was going through all the set up for one fender I might as well do them both. It's that killing two birds with one stone but fenders instead of birds.
First thing was to get the media ready. I have a bag of fine grain "Black Beauty" and a 5 gallon bucket of the same that I swept up from the body shell blasting. I did my old trick of using a screen to filter out the large crud and reuse it.
After filtering the media, I loaded up my pressure blaster and set up in the driveway. I spread an old sheet out to keep from doing any more damage to the fender.
Then it was time to attach the air hose, put on my blasting hood and mask, and have at it. I had the material flow choked down and angled the spray nozzle at a 45 degree angle and kept it moving so there was no heat buildup that could damage or warp the fender. It cleaned up nicely, but there was still some of that undercoating that wouldn't budge. I'll deal with that later.
The blasting got into some of the nooks and crannies around the headlight bucket that would otherwise be hard to get to. I also have a relatively clean surface to apply Zero Rust when the time comes.
I elected to go ahead and blast the outside of the fender instead of using the stripper on my 4" grinder as I did on the right fender. Again, I was careful not to cause any heat buildup.
As you can see below, it cleaned up nicely. Some of the surface rust didn't completely come off. I'll use either my stripper or DA sander to clean it up.
The top rear and edge of the fender had some of the more stubborn surface rust.
Now it was on to the right front fender. I had already stripped the outside as my previous post described.
I previously started cleaning the inside of the fender with a braided wire brush, but it was a messy process creating black flecks of the undercoating that flew all over the place. So the inside of this fender became a media blasting candidate, especially around the headlight bucket and the top inside.
After the process, it cleaned up fairly well but still left some undercoating on the top inside surface. And just like the left fender, there is surface rust that has the scale cleaned off, but it will need to dealt with.
The headlight bucket has residual undercoating as well.
Overall, I'm fairly satisfied with the results and both fenders are much cleaner than I could have done with any other mechanical method. Now it's on to removing the undercoating.
I recall from one of my fellow Mustang bloggers that a heat gun would work well to heat the undercoating up and then scrape it off with a puddy knife. I picked up one at Menards that was on sale. I figured I didn't need one with all the bells and whistles. With the left front fender on the body panel stand, the heat gun in my left hand and the puddy knife in my right hand, I began the task.
I was pleased with how quick and easy it came off. I was not so pleased with the residue left behind.
I tried laquer thinner to remove it. It didn't work well and it would have taken quite a bit of time. I was out of acetone. Bug and Tar remover didn't even put a dent in it...no pun intended. I got out my 9" grinder with the nylon brush and it cut through it.
However, I noticed that with the black undercoating removed, the pattern was still visible. Upon closer inspection, I discovered it wasn't more residual undercoating but rust that formed under it.
I am now convinced that ALL undercoating has to come off all the body and panels. Otherwise, there will be this dormant rust waiting to rear its ugly head down the road. I used my 4" grinder with the stripping pad on it to see how well it would work to clean up surface.
That is what you call clean metal. So this will be the process though a bit tedious to clean up the rest of this fender and the right front one as well. I'll have to do the same thing on the inner fender and wheel wells on the body.
I continued removing all the undercoating with the heat gun. The rest of it came off without a hitch.
The headlight bucket was a little tricky because of the rounded surface and it had some between the bucket and fender surfaces.
After that, and upon closer inspection, I noticed that all was not well in fenderland. Wanna guess?
Yup. Rust. Pinhole rust.
And of course it had to be in a difficult location to repair. A view from the inside of the bucket with the back lighting shows the half dozen spots. Bugger.
It was time to do a closer inspection of both fenders. I got them off a 68 convertible a guy was parting out. I paid $90 for the pair that included literally everything... headlights, trim, bezels, etc. So I can't really complain. But I would hate to have to abandon one or both for a replacement panel.
My major concern was rust back behind the bucket and fender. If the bucket was rusted on the back, there could be more elsewhere. I was relieved to discover that there wasn't any other rust that would need to be cut out and replaced. It was really clean around the bucket to fender flange on the side of the fender.
Along the top of the fender, there is some pitting, but it's not severe. The flange there also looks good. you can just make out one of the pin holes in the photo below.
I'll come back and sort out how I'm going to repair the left front fender. The right one was OK.
I wanted to see how that surface rust left after blasting would clean up. I got my DA sander out and gave it a quick once over. The coarsest pad I had was 80 grit. It took some time and finesse, but it cleaned up pretty good. I also discovered a few more small dents and dings that will need to be worked out.
I also found rust on the rear lower corner of the left fender on both the inside and outside. The inside will be a little tricky especially since it will involve prying up the flange of the outside skin.
The outside will be more of a straight-forward patch. That will be the first one I'll do so that it will allow me to inspect the back side to determine how extensive that repair will be.
I've had lots of practice making weld patches and repairs. So this will not be anything I haven't had to do before. I hung both fenders on the panel stand. The right front is definitely more solid in the headlight bucket area. The left doesn't look so bad here, but I can't leave it that way.
That was all the work I was going to get done, especially since I had a blasting mess to clean up out in the driveway. While doing that, a thought hit me about the left fender repair. I still have the original fender that came on the car. Granted it's got a tear in the wheel lip, and a dent in the lower front wheel lip, but the rest of the fender is solid. I realized I have my patch panels already made!
I don't know if I'm going to go through the effort to drill out all the spot welds and remove the entire bucket, or just cut out the rusty section and put a patch in it. I'll have to take a look at it to find out how many welds there are and more important, how the access will be to plug weld the whole bucket in.
That's for another day. Until then....