I needed to make sure the floor was in contact with the frame rails. I had a couple of cinder blocks that I used to weigh it down. Then I took a look at the gaps and fit. I laid underneath and marked the outline of the frame rails, transmission tunnel, and rear and front pan overlap.
I wasn't happy with the fit between the floor pan and the transmission tunnel crossmember not to mention the other gap along the transmission tunnel.
I decided to work on the transmission crossmember to floor pan fit first. My plan was to make the radius of the floor pan match the crossmember. Instead of using a rounded nose body hammer which would have left a ton of small dents, I made a buck from a 2"x4" and my multi-tool.
Then I used the buck and my 22 ounce hammer to "persuade" the radius into shape.
It did help, but not quite enough to get the contour right. So I decided to go with a profile template to have a better idea of making the radius fit.
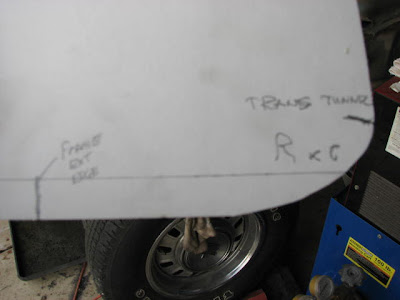
I used a piece of micro-corrugated and set the straight edge along the top of the flat section of the trans crossmember. Then I traced the profile of the crossmember onto the cardboard. I cut along the line and ended up with this template...
 |
| "F xc" marks this as the front transmission crossmember profile |
I did the same thing for the rear edge of the crossmember....
 |
| This is the profile for the rear transmission crossmember |
I marked two datum points on the templates. One was the edge of the transmission tunnel where the original floor was cut away. The other was the line marking the inner edge of the frame rail. I looked through my dollies in my body tool box and discovered one that almost fit the contour exactly. This was the front template fit....
...and this is the rear template fit...
The difficult part was that working one contour changed the other slightly. So, after multiple attempts at working both sections of the floor, I was getting close to a good contour on both sections of the floor pan.
I still needed to work the edge to get it to fit the transmission crossmember profile, but I also needed to trim the floor pan to fit. I wanted the contours to be as close as possible so that I didn't end up short with material later after I trimmed it. There were multiple...and I do mean multiple times... that the floor went in...and then came out for some more massaging...and went back in, etc, etc, etc.
This is after the first attempt. Notice that there's still a gap, but part of the reason the gap was there was the extra material that will eventually be cut off for the butt weld along the trans tunnel hadn't been removed yet.
The fit along the rocker panel and on the frame rails was nice and tight.
I finally got the floor pan formed to match the contour of the crossmember as good as possible.
I then proceeded to trim the floor pan on the rear side and the transmission tunnel. It took 3 trim sessions and a bunch of grinding with my 24 grit 2" air sander to get the gaps consistent, but the time and effort were well worth it.
Now it was on to drilling out the holes for the rosette welds. I marked the outline of the trans crossmember and the frame rails. I also marked the overlap line for the firewall extension.
Here's the finished result with all the holes cleaned up of burrs from the drill. Here's the view of the fit from the passenger compartment...
...and this is the view from the engine compartment.
So, after 6 hours of work, I decided to call it a day. I didn't want to start welding at 4 in the afternoon when I was tired and hungry.
Speaking of hungry, for all the time I was working on the Mustang, I was also babysitting my smoker. The meat went on at 10 AM and I hit the garage shortly thereafter. I loaded it up with a beef brisket, a whole chicken, a pork shoulder, and a rack of beef ribs...
The chicken was already done around 2 PM. So I pulled it off and put the ribs on. All the meat was done by the time I got everything put away in the garage around 5 PM. So I would say I made some progress on a number of fronts. Hey...a guys gotta eat, and it might as well be good eats. Besides, restoring a Mustang is hard work as many of you know. The difference for us is that the smoker is at my house! I hope to get the start on welding in the floor sometime later this coming week. I don't have anything on my agenda which is really strange, but as my life has often been, I'll make no predictions. There's always hope though....


Dennis, good to see craftsmanship alive and well in Indiana. Nice work!!!
ReplyDeleterj
This comment has been removed by the author.
ReplyDeleteExcellent walkthrough on fitting a floorpan but the BBQ is the best part.
ReplyDeleteAs you'll soon learn, patience is key in working on a restoration project. So far so good!
ReplyDeleteLeLu, Funny you mention patience. That's the first thing people say when they see the fastback. "How do you have the patience to do this? I could never spend all that time working on it." But like any restoration project, I can see the vision of the end result...whenever it happens. Thanks for the comment.
ReplyDelete