Tuesday, August 27, 2013

Right Rear Quarter Panel - Part 8: The final metalworking chapter


 At our last exciting episode, I was in the process of welding in the lower rear quarter patch panel...more specifically repairing the all the "P" words.  Pinholes.   They are the bane of my welding existence.  But the show must go on.

After I got my wife and mother-in-law on the road to Michigan Saturday morning for my M-I-L's 90th birthday party with her friends in Battle Creek, that left me home alone.   I left off where I did last time.  You know the drill.  The only saving grace is that there were actually fewer and fewer pinholes after each round... 
 

 And then I realized while adjusting the backlight  I was using to find where I needed to do the spot tacks that I also needed to dress the back side of the weld joint...


The reason I was dreading this was I knew that when I was done, I would open up more...you guessed it...pinholes.   It did finish out fairly well, especially considering that I will have the factory sound deadener sprayed inside that will pretty much cover the joint.  But knowing it would be there would bug me to death.  Then again, it's in a place that hardly anyone will really inspect closely.  So I decided to declare the inside done. 


You can probably guess what happens next.  After setting up the backlight again, the "P" word reared it's ugly head.  Yup.   I almost had as many as I started the day with.   So out came the rediscovered paint pen and they got marked...


When I got to the upper right hand corner of the patch panel, the welds were not laying down good at all.  And then the blowout occurred.  This hole was not going to be fixed easily. 


Between the thinned metal from all the welding and grinding, and discovering that the welder problem was I had come to the end of a spool of wire, I figured I had no choice but to make a patch to fill the buggered up area.  I cut a small area out making sure I had enough solid metal to weld to...


Then I made the patch and gave it a little tap and bend to match the contour of the fender lip.  I used the stud gun to put a pin in the piece so I had something to hold it into position while tacking it in place...


After exercising much patience, the patch was in...


I got to the point where I called the war on pinholes done.  I don't think it was a total victory since I'm sure there are a few small ones in there that the back light didn't show.

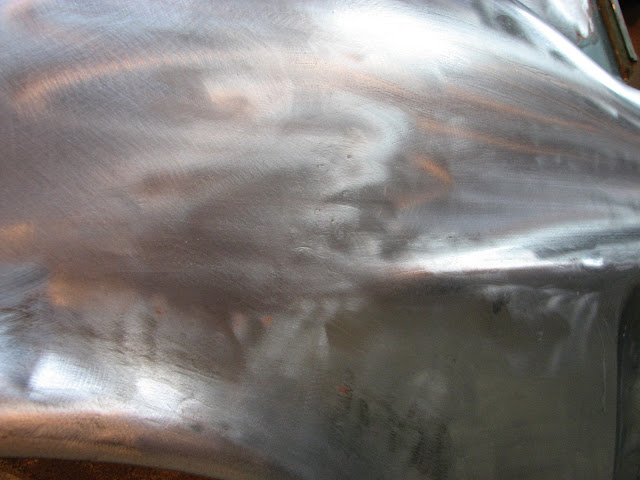
To blow off some frustration over the pinhole situation, I decided to dive in and strip the paint off the quarter panel since the next step will be to start the filler work.   After about 45 minutes, I was left with a fairly clean quarter panel.


Even the patch panel looked pretty good...


Now I have a nice clean quarter panel.  I also was able with a smooth surface to identify a couple of areas that will need some work removing smaller creases.  But with the temp climbing toward 90 degrees and after 6 hours I was tired, my back was screaming at me, and I was filthy dirty from all the grinding and paint removal.   I closed up shop for the day and decided I would tackle more the next afternoon. Beside, the Colts were playing the Browns and the night race  at Bristol were on.    I will kiss the person on the lips who developed picture-in-picture TV.

Sunday however brought some unexpected schedule changes. The brother of one of the members of church had emergency surgery and another was transferred to a specialized rehab hospital.  Both hospitals were located only 2 miles apart, but they were a 40 minute drive away in Greenwood.   I also discovered that Apple's standard map app with the latest operating system iSO 6 stinks.   The location of the rehab hospital was wrong.  After going inside to the receptionist and asking about the hospital, she said, "They moved to their new facility about 4 years ago."   Really?  Four years?  Someone needs to have a chat with the GPS database people.

Anyway...by the time I got home, it was closing on 9 PM and my wife and M-I-L had returned from Michigan.   I got them unloaded and decided to call it a night.   Maybe, just maybe, I would be able to work on the fastback Monday night.

Monday arrived without much fanfare or emergencies.   After getting home from work and making dinner (I do about 90% of the cooking at our house) and having opened a late anniversary present from my wife (Woodford Reserve)  I was trying to muster enough motivation to get to the garage.  With the promise of a refill after I was done working on the car, I headed out to the inner sanctum, that, buy the way, was a nice cool 74 degrees since I had turned the garage AC on when I got home. :- )

I had marked the offending areas of the panel with a circle denoting the beginning of the deformation and a line down the middle of the crease.   I had two areas like this to repair.

The stud gun came into play once again.  The trick is to pull the dent from the outside in.  Since the wheel well was behind these two areas, there was no way to get a dolly behind it.   The first round of studs were placed halfway between the valley and the edge of the deformation...


After gingerly pulling on the pins in an alternating pattern, the dent was coming around...


There was still a low spot that felt confined to the valley of the dent.   So another couple of studs were placed and pulled...


Almost there.   I needed one more to get the one remaining low spot...


After that pull, the dent was almost history.   A skim coat of filler will level it out, especially the "dimples" left from the stud gun.


Onto dent #2.  Same drill.  The first round was placed again halfway between the valley and the edge of the deformed metal...


After the first pull and cleaning up the area, another round was needed in the valley of the dent...


There were still a couple of low spots.  So a third set of only 2 studs were placed and carefully pulled...


There was this one low spot that was barely perceivable, but I couldn't leave it.  So with one more stud and a few taps with the slide hammer, it was level...


The finished product was OK for me.  I just have to put my anal retentive part of me on a shelf sometime.


The reflection of the light and the dimples from the stud pins makes it look uneven, but the almighty feel with the palm of my hand says "smooth."


There was one more area back by the side marker light.  There's no need to explain the process.

Step #1....


Step #2...


Step #3...


And so folks, I'm officially calling the heavy metal work on this rear quarter panel DONE! 


It's come a long way.  And in spite of my "pickiness"  I have to remember what I started with...


...and this ugly lower rear quarter section...


And now?   Well, I'll leave it to you to decide.


It's hard to believe that this journey started back in February.  Yes.  It's been 6 long month and I'm not even going to count the hours and $$$ of tools.   However, I will say, it's a whole lot better than when I first began.

Now it's on to cleaning the metal inside and seeing what other serpent is hiding in there waiting to bite me.

Until next time....
Sunday, August 18, 2013

Right Rear Quarter Panel - Part 7B

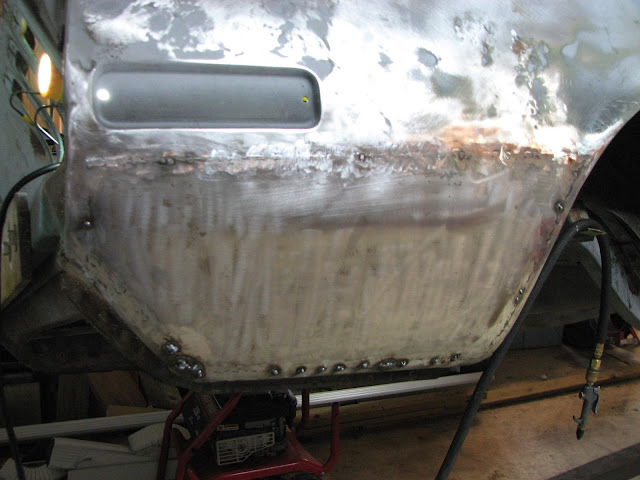
I'm finally back to doing work on the fastback.  It's been a long time...long enough that flash rust was starting to form, particularly on the joints.  After a quick clean up of the affected areas, I got back to where I left off...finishing welding in the quarter panel patch.

There really isn't a whole lot to show for the time put in.  It's the same ol', same ol' process.   Tack...skip...tack...skip...tack...skip...etc. until there's not much room in between the tacks....


Then it's grind...and then grind some more...and some more.   The 4" angle grinder with a 60 grit flap sander knocked down most of it.  Then the 2" air grinder finished up the details...


It didn't look too bad and it didn't have must weld distortion in it.  But then I looked at it from the inside and saw tons of my favorite repair...PIN HOLES.   A bunch of PIN HOLES!!!

Welding from the inside to fix them would have been difficult process, even with the rotisserie.   I resorted to my previous trick I used on the floors.  I got my halogen work light and set it up in the trunk so that the light would shine from the inside.   This is what the PIN HOLES look like...


Aaarrrrrgggghhhhh...among other choice words.   So I started the process of tacking the holes.  I was making fairly good progress and thought I'd finish it up in one day when my Aussie mate down the road stopped by for a chat.

He's quite a character.  We talked about a couple of projects he's got going on in his shop, particularly a 32 highboy roadster that someone started and Lord knows who butchered the frame by incorrectly boxing it and what looked like 'eyeballing' the suspension mounts.  He's had to make all kinds of modifications to make it right.  The crazy thing is that the body is a Brookville roadster body that goes for around $13K.  Sometime you wonder what people are thinking when the build a car.  We chatted about Connie Kalitta.  For those of you who are unfamiliar with him, he used to be a big-time drag racer.  I remember seeing him in his top fuel dragster at US 131 Martin Dragway in Michigan.  Wow!  220 MPH in the quarter mile was hot stuff then.   He's since retired and is CEO of Kalitta Air.  His airline is strictly custom air cargo.  I used to see his planes all the time when I lived in Lexington, Kentucky.  He would be hired to fly horses overseas that high-rollers purchased for breeding stock.

Anyway...I digress.  After about 45 minutes, I needed to stoke the smoker so the multiple racks of ribs would be done.  Time had, as Steve Miller sang went "Slipping, slipping, slipping, into the future."   It was after 6PM and I hadn't eaten anything substantial since breakfast.  So with hunger and a dirty body, I shut down shop for the day.  However, I did a final check of pin holes and did make what I considered substantial progress.  With a soap stone in hand (can't find paint pen) I marked the pin holes that were left.  I'm sure more will appear since they seem to breed like rabbits. 


 I am hoping against all odds that after the next session, the welding will be done and I'll get back to the body tools to smooth out the remaining imperfections.

As far as I can tell, beside going back over the body and dressing up the other welds and PIN HOLES I find, this should close out the welding on the body shell.   Then I can start the process of using Metal-To-Metal filler to make the weld joints disappear where they would be visible.

Progress...be it slow...is still progress.  That's my story and I'm sticking to it!

Until next post....

Monday, August 12, 2013

Getting Some Motivation

The last time I worked on the fastback, it was the month of June.  Here it is August...the middle of August and I find myself in a slump.  It's not that I haven't had excuses to not work on it.  Some of them good are...and some of them not so good.  But it is what it is.

July was crazy busy.  I spent 8 days in Michigan at our family cabin "on vacation" taking care of some maintenance items, like building new steps to get down to the level of the patio.  There was dock repair.  But I also managed to squeeze in some fishing that netted some nice bass.

After that was the planning for my mother-in-law's 90th birthday celebration.  My family was coming from all points far away...the Florida Keys, Kentucky, west Iowa, Chicago, and Michigan.  I don't know how many pictures my wife and I scanned from photo albums for a powerpoint preso and converting old home movies to DVD.

In between all that, the airplane schedule opened up and I finished off my high-performance aircraft endorsement along with the coveted requirements for the G-1000 Garmin glass cockpit Cessna 182T.  I did take my son-in-law and brother-in-law up in the 182 T before we had the full complement of people arrive...

That's me on the left and my son-in-law on the right.  The technology in this bird is incredible!

The celebration was the first weekend in August.  With 11 adults and 4 children  age 5 and younger at the house, it made life...well...interesting.   So this past week was one of physical and emotional recovery. 

Part of the recovery therapy was going over the Lucas Oil Raceway Park (AKA  Indy Raceway Park) for the annual Indianapolis Mustang Club all Ford show.

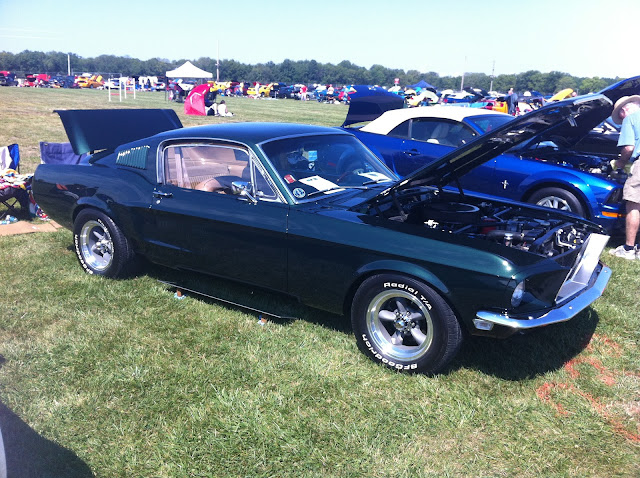
There were number of cars there that were nice and a couple that were pretty rare.  I was surprised at the lack of non-Shelby Mustang fastbacks.   There was also a lack of 69-70 fastbacks as well.   Since it was an "all Ford" show, it included any vehicle with a Ford driveline in it.   I should have taken a picture of it, but someone shoehorned a 289 into an MGB.   Anyway...here's a sampling of some cars that caught my eye.

This is one of the 2013 Daytona 500 pace cars.  We see these quite frequently in the area for the Indy 500 and the Brickyard 400.   There are usually 70-80 decked out as pace cars and used for race day and for track officials and guests to use.

This is a sort-of Bullitt tribute car.  It had the nugget gold interior in it.  It also had frame connectors and aftermarket AC.


I can't remember the last time I saw a Pantera.  This one was a nice driver.  It wasn't super clean and detailed, but wasn't beat up either.  The interior and exterior I would judge as a 7 or 8.  I forgot how much room the transaxle took up and that the 351 was right behind the driver's seat.


Then there was this pair of GT's.  What else can you say about them?  Expensive and cool....or cool and expensive?


My wife noticed where are the cars were from by their plates.  Ontario, Michigan, Kansas, Massachusetts, Maine, Florida, Georgia, and Texas to name a few.  I also was amazed at the number of trailered cars there.   The only way mine will end up on a trailer is if it breaks.  I'm not building it to coddle in a trailer or under a car cover in the garage.  It will be driven!

So after our little excursion, that got me motivated to get some time carved out and work on the fastback.   This Thursday night has been inked in on the calendar.   I'll check my consumables and make sure I'm good to go.  Hopefully I can put a dent in that rear quarter panel and get it done.  Wait a minute.  I meant take a dent out of the rear quarter.   You know what I mean.  Git - R - Dun!!!

Saturday, June 29, 2013

Right Rear Quarter Panel - Part 7

How long has this friggin' panel been the unrelenting challenge of my life?   I thought the floors, toe board and firewall were all time consuming.   But, at this juncture, I do see light at the end of the tunnel, even if it is a pinhole of light.

My wife headed to her loom to finish a blanket for #1 grandson's family picture with his mom, dad, and two sisters.  It's needed next weekend.  But it has to be done before  tonight since my wife and I are leaving tomorrow afternoon to our family cabin in northwest Michigan.

With my wife at the loom, that means I headed to the garage to see what additional progress I can make.

I had previously cleaned the inside of the trunk drop off and wheel well and gave it a coat of Eastwood's rust converter.   Then I gave it a top coat of flat black primer.

The patch panel has previously been fitted to  the opening with the exception of the top.  This was a delicate operation since the gap potentially could change the profile of entire lower half of the panel.  After getting it close, I used the welding clamps to position the patch and see how it would fit.


It looked OK for straightness along the joint...


There were a couple of places that required some massaging with a pick hammer and dolly to get the two sides aligned without any offset....


Then the profile templates came out for a trial fit.  Each of the photos represents station 1 through 6...


For the most part, the profile is not bad.  The gaps are no more than 1/16" and are in the forming of the patch panel itself.  Go figure.

I started the welding process by putting in the spot welds evenly and widely spaced so that I didn't and any unnecessary heat into the panel.


But as luck and metallurgy would have it, there was some shrinkage in the upper joint that caused it to "suck in" somewhat.  This is the front portion that is near the fender opening...


...And this is the rear half by the side marker light.   I expected this to happen to some degree.  It's hard to have a perfectly spaced gap, not to mention the variation in the panel from all the metalwork.


Since I had a few of the welds in, if went to work to straighten the panel after each set of welds.  I ground them down so that I had a smooth surface to work with the body tools that you're already familiar with from previous posts.  When checking with my trusty contractor square, the gap was negligible...


Progress was OK with the exception of two interruptions.  1. I ran out of welding wire.  I had been using Lincoln .025 MIG.  So I dug out a spool of .023 from Thrifty Supply and was back in business after loading the wire, installing new wire cleaner pads, and a new tip.  Right as I was getting everything ready to go, my Australian neighbor who owns a speed and hot rod shop stopped by and updated me on his trip to California to the Drags and his visit to his friend, Chip Foose.  Yeah, Chip Foose.  Dang!  Wonder if I could weasel a way to get a rendering of my car.   That ain't happening.

Anyway, it's not looking too bad after removing the weld clamps and cleaning up the welds...


Sighting down the panel appears to be pretty straight...


Here's a shot after two more rounds of welds...


Here's how the quarter panel looks after about half the welding and cleaning up the entire panel...


Since I wiped out most of my vertical station marks for the profile templates, I put them back on.  It's a little hard to see in this picture, but it's starting to look "purrdy."


It was time to close up shop since I need to get organized and ready to leave for Michigan.  I checked one more time with the templates to find out if all this work is keeping it close to the driver's side rear quarter panel.  Again, the following pictures are in order of the station numbers from 1 through 6...


Station templates 3 through 6 didn't fit as well as 1 and 2.  The difference is in the bottom 1-2 inches.  The aftermarket panel didn't have as much radius as the original.  But overall, it's not too bad.   My decision at this point is to finish up the welding and keep working horizontal joint to keep it straight.  Then I'm going to call this metalwork done.  It's not perfect in comparison to the driver's side, but it is what it is.  And what is will not be noticeable unless there's some anal engineer with a set of templates to compare sides.   So the next installment on this part of the car should complete the work on this corner of the fastback.  Phew!

As an aside, I was going out to get checked out in the club Cessna 182.  It's a bigger, heaver, and more powerful airplane than the 172.  It would be like comparing a Ford Fiesta to a Ford Fusion with a V6.   It's considered "High Performance" and requires a special endorsement to satisfy the FAA.   So everything was going well.  Preflight list ?  Check.  Pretakeoff list?  Check.  Takeoff was near perfect.  I climbed to our initial altitude of 3000 feet and leveled off...or tried to level off.   It was then that I discovered that we had a problem with the pitch trim in the airplane.  The manual trim wheel would not move to add down elevator.  The electric powered trim motor worked to lower the nose, but that was short lived.   We made a 180 degree turn and headed back to the airport.  The last thing we needed was a runaway trim condition and loose control of the airplane.   The good news is that when reducing power to land, the nose naturally lowered and I got it stabilized on final approach.  The landing was not perfect, but it was after all my first in this big bird (no pun intended).   The club check pilot, who has a boatload of hours, said, "This is the first time I've ever had a trim failure."    Definitely a learning experience as all flights are, but this one was a little more intense.  Hopefully, the next flight will be uneventful.

I suppose that's one advantage to working on the fastback compared to flying.  The worst thing I have to worry about is the fastback rolling uncontrolled on the  rotisserie.

Until the next time...