Yes, I'm still here. And yes, it's been over 3 months since my last post and associated efforts on the fastback. But as many of you know, life happens and sometimes it comes at you fast and furious. The difficulty I've been having is due to my occupation and other personal and family commitments. It makes working on the fastback during the weeks difficult at best with evenings fairly well filled up. Add to that getting home at an hour that makes it hard to set up shop for just an evening and work just doesn't happen on the Mustang. That leaves Saturday and Sunday afternoons as the optimum time to get something done. Those time slots have been challenging to keep open over the past couple of months.
First off, there are the family commitments--birthdays, wedding anniversary, visiting kids in far away cities, and health issues. So you'll have to put up with the litany of events before I get to the "car" stuff.
So let's tackle one at a time. For our anniversary, we went to a bed and breakfast in a community on the north side of Indianapolis in Carmel, Indiana. When I made the reservation, the owner said, "Are you going to attend "Artomobilia"?" Apparently it's a huge auto show on the main streets of Carmel. So after a nice dinner the night before and restful stay at the B&B, we headed a few blocks to downtown. All I can say is WOW! There must have been tens of millions of dollars of cars there if not more.
A wide variety of makes and models were represented. There were plenty of American muscle cars from the 60's through the 2000's. Old classics were present like an all original 41 Ford coupe. From across the pond to the east were, Porsche, Jaguar, Austin Healey, VW, MG, Lotus, Maserati, BMW, Lamborghini, and Aston Martin...

Can you believe that out of 6 Aston Martins only this one had a 6 speed manual transmission? All the rest were automatics with paddle shifters. Boring!

Then there were the out of production American cars that had representation there as well. When was the last time you saw 10, yes, 10 Deloreans parked together....

....or the last time you saw a Bricklin?

But the star of the show was sitting at the heart of downtown for everyone to see...

Do you recognize it. It is the only 1969 Shelby GT 350 Boss 302 Mustang ever produced. Apparently Ford was going to make a run of 36 of them but cancelled the order after this prototype was made. It was a stunning Mustang. I can't even imagine what the value of this Shelby is, but I overheard someone who knew the owner say, "north of 7 figures." A million dollar Mustang!!!
I spent quite a bit of time talking to the one-owner of an unrestored 1967 Shelby GT 350. It was a nice car showing its age with some paint bubbles at the bottom of the doors and fenders. I really liked the parchment interior in it. I may just deviate and go in that direction. It would look really classy with the Tahoe Turquoise exterior. Anyway... so that was the end of August.
My wife had a business meeting in DC in September. With our daughter and her Dr. husband having moved there in May, we decided to make it a weekend trip. I snagged the flying club's Cessna 182T, the"glass cockpit" airplane and flew into the heavily traveled east coast air traffic control corridor. I had taken the on-line FAA course that's required to fly into the Washington DC special flight rules airspace. I was definitely playing in the "big boys" sandbox. The trip went well with no F-16s showing up on our wingtips. It was also my first "mountain" flying experience. All-in-all, the trip was fun and went well, not to mention only 3 hours and 15 minutes from Indy to Manassas, VA.

After that trip was another one to Michigan to do maintenance work and close the family cabin for the winter. That was a crazy quick trip with plumbing, roofing, and fireplace repairs taking place in 2 days. Not much time for fun and relaxation there...


Another weekend was spent the beginning of October in Lexington, KY visiting my daughter and her family. Unfortunately, this trip was about supporting her as she underwent another scan for thyroid cancer and the ensuing 2nd radiation treatment she required. As of this writing, the oncologist are hopeful this will be the last treatment. Her strength is coming back just in time for the holidays.
Meanwhile, a lot of attention was needed at the home front. Trim painting. Winterizing the yard and equipment, etc. The joys of being a home owner.
Mixed sporadically into my schedule was my on-going commercial pilot training. I finally studied enough to take and pass the written exam. Now if the weather will cooperate, I'll get the flying part of this out of the way in the next month or two. I'll be glad to have this next step in aviation behind me.
There were a number of Saturday's where work overflowed into them rendering them unavailable. The garage was a mess from tools and supplies sitting all over the place from projects both near and far. With our early dip into winter, I wanted to make room for my wife's car in the garage. That would leave one less vehicle to clean snow and frost off in the morning.
So with an open workspace, and my wife taking her mom to a play yesterday, that left a few hours in the afternoon to try and get work on the fastback kick-started.
One thing I did a couple of months ago was upgrade my 25 year old MIG welder. It was a Century/Lincoln unit that had 2 heat settings. It worked well on the heavier sheet metal of my 1929 Model A but has been a challenge on the fastback. I know, I know. I should have done this 5 years ago. With the remaining patching and the dressing of the welds needing to be done, it was time to do something about it.
I happened across a floor demo Hobart 140 Handler for almost 40% off the list price with the 5 year factory warranty. It's basically a Miller unit with the Hobart name. It uses all Miller consumables and has 4 heat settings. I could have bought a Miller 140 that has infinitely adjustable amperage settings, but couldn't justify twice the price for what this one costs. Besides, it's a giant leap forward in a quality MIG machine from what I had. My recommendation for anyone who has to do a serious amount of MIG welding on their Mustang is to pay for a good machine up front. You will not regret it, not to mention having a welder that will last for years.

So with the welder ready to go, I went to work back on the left front fender...the one I thought I was done with. After putting in the lower patch, I was inspecting the repair when I noticed the dreaded sight that has been hounding me throughout this restoration. Wanna guess? Pin holes. Not welding pin holes, but more rust! And the kicker is the rust perforation wasn't more than an inch above the repair I last did. Aaarrrrggghhhh!
So it was on to making another patch. I outlined the area to be removed to make sure I had enough new material in the new patch. I also didn't want to cut across the weld seam from the previous work. Sometimes it's a problem with the difference in weld material versus unwelded steel. At least that's what one of my welding buddies told me.

The cutting wheel made quick work of removing the offending pin hole area...

I used a piece of micro-corrugated and laid it over the opening. Then I pressed it into the opening which left the outline of the cut out area. I used a straight edge to highlight the border...

I cut out the template and was going to use part of the original fender so that I'd have the same contour.


I took the DA sander with a P80 pad and started to strip the old fender. Unfortunately, as the top layer of paint came off, it revealed an uneven layer of bondo. So taking a piece of the fender was not going work.

I dug out a piece of scrap left over from the right toe board repair I made way back when. I scribed a line around the template and cut out the piece with my sheet metal shears.

After taking it to the vice and doing a little massaging to get it to match the fender contour, I cleaned up the edges of the fender and the patch. Using one of my welding clamps, I got it in position ready for tack welding in place.

After getting several tack welds in place, I took the clamp out...

Then the tedious process of multiple tack welds began. I did one tack per side and cooled them off with compressed air. Then it was more tacks and cooling, etc., etc...

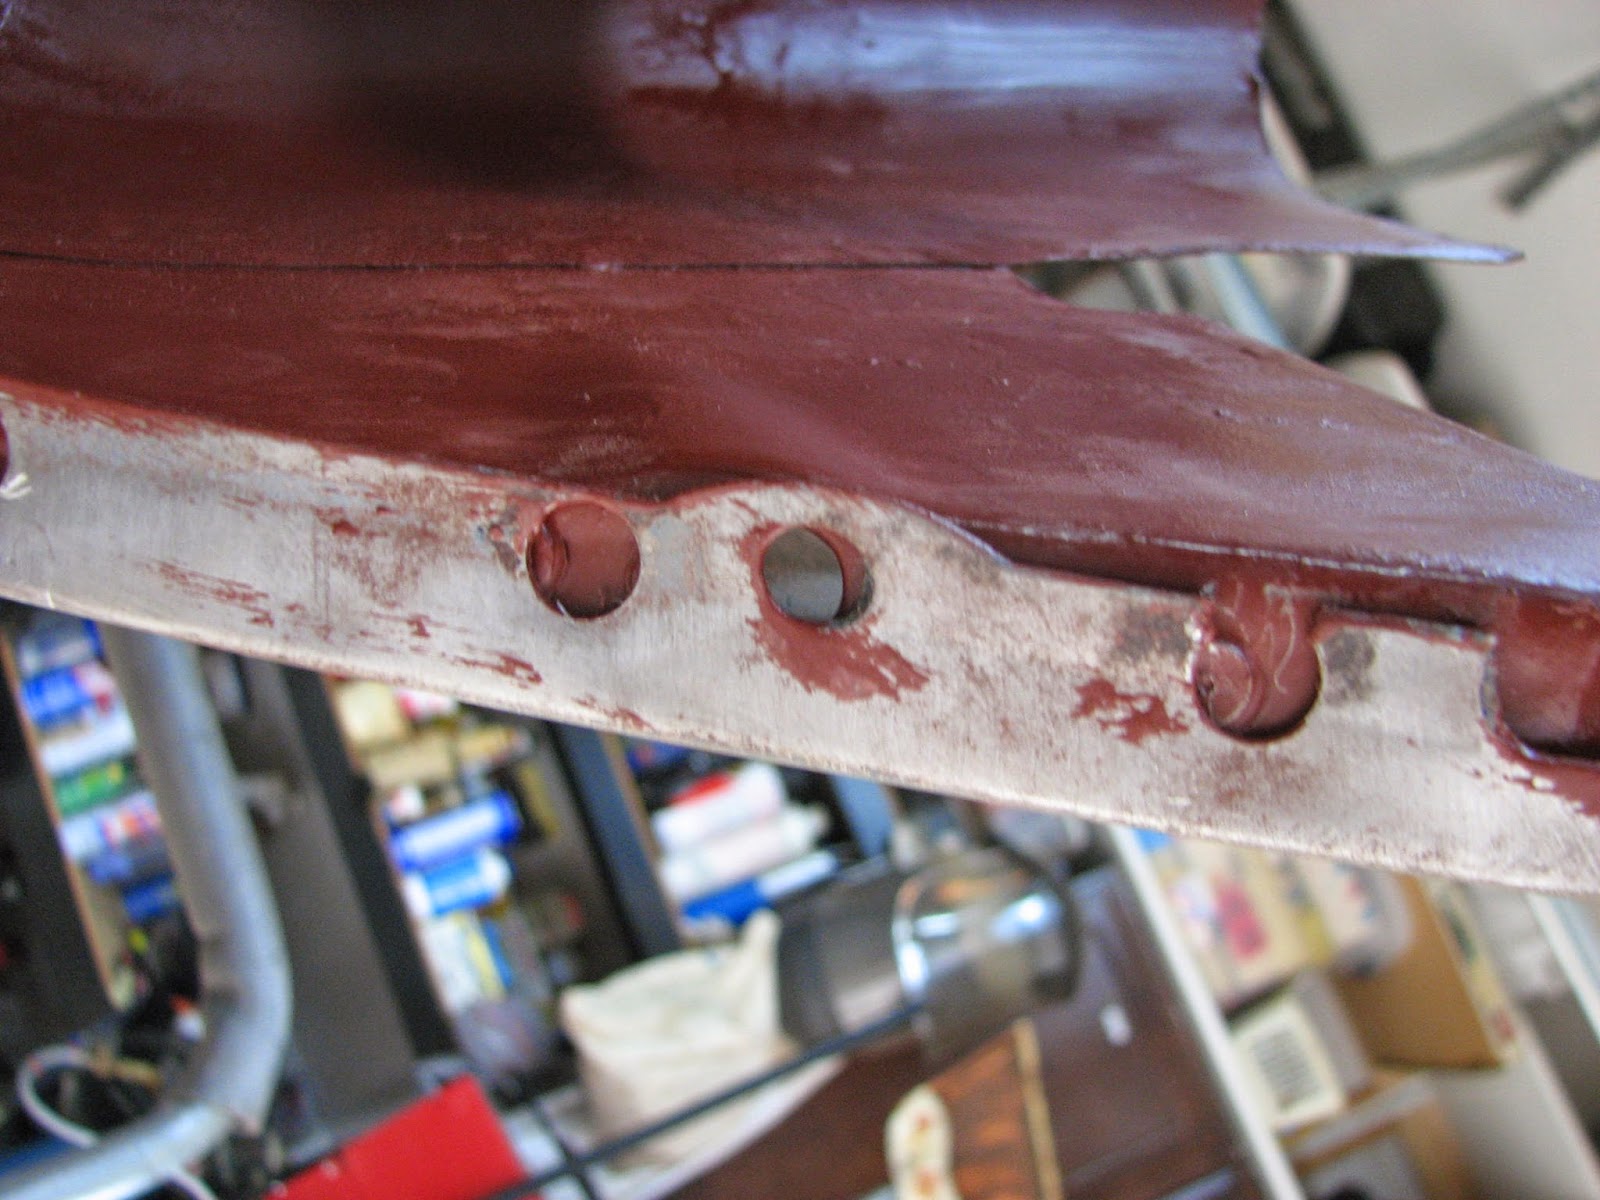
I ground down the tacks after 3 groupings. I love the new welder! Night and day difference in ease and quality of the welds. As I neared the end, I marked where I needed to fill in the seam with tacks so that I didn't have any visible pin holes (dang! that again) left...

Then I hit the panel with the DA sander and P80 disc. It's not perfect, but it's not so bad either. I have some hammer and dolly work I can do to level out the surface before applying any Metal-to-Metal filler which will be the next step. But that won't happen until I get the fenders on the body and work all the panels together.

My next project will be to remove all the remaining undercoating from the body, particularly in the rear fender wells. Then it's on to doing the final weld dressing so that I can actually start putting the finishing filler on the firewall and floor. Once that's done, I'm hoping I can get some DP-74 primer on those areas.
I am eating the elephant one bite at a time. I just need to take bigger bites and not so far apart!
Until the next time...
First off, there are the family commitments--birthdays, wedding anniversary, visiting kids in far away cities, and health issues. So you'll have to put up with the litany of events before I get to the "car" stuff.
So let's tackle one at a time. For our anniversary, we went to a bed and breakfast in a community on the north side of Indianapolis in Carmel, Indiana. When I made the reservation, the owner said, "Are you going to attend "Artomobilia"?" Apparently it's a huge auto show on the main streets of Carmel. So after a nice dinner the night before and restful stay at the B&B, we headed a few blocks to downtown. All I can say is WOW! There must have been tens of millions of dollars of cars there if not more.
A wide variety of makes and models were represented. There were plenty of American muscle cars from the 60's through the 2000's. Old classics were present like an all original 41 Ford coupe. From across the pond to the east were, Porsche, Jaguar, Austin Healey, VW, MG, Lotus, Maserati, BMW, Lamborghini, and Aston Martin...
Can you believe that out of 6 Aston Martins only this one had a 6 speed manual transmission? All the rest were automatics with paddle shifters. Boring!
Then there were the out of production American cars that had representation there as well. When was the last time you saw 10, yes, 10 Deloreans parked together....
....or the last time you saw a Bricklin?
But the star of the show was sitting at the heart of downtown for everyone to see...
Do you recognize it. It is the only 1969 Shelby GT 350 Boss 302 Mustang ever produced. Apparently Ford was going to make a run of 36 of them but cancelled the order after this prototype was made. It was a stunning Mustang. I can't even imagine what the value of this Shelby is, but I overheard someone who knew the owner say, "north of 7 figures." A million dollar Mustang!!!
I spent quite a bit of time talking to the one-owner of an unrestored 1967 Shelby GT 350. It was a nice car showing its age with some paint bubbles at the bottom of the doors and fenders. I really liked the parchment interior in it. I may just deviate and go in that direction. It would look really classy with the Tahoe Turquoise exterior. Anyway... so that was the end of August.
My wife had a business meeting in DC in September. With our daughter and her Dr. husband having moved there in May, we decided to make it a weekend trip. I snagged the flying club's Cessna 182T, the"glass cockpit" airplane and flew into the heavily traveled east coast air traffic control corridor. I had taken the on-line FAA course that's required to fly into the Washington DC special flight rules airspace. I was definitely playing in the "big boys" sandbox. The trip went well with no F-16s showing up on our wingtips. It was also my first "mountain" flying experience. All-in-all, the trip was fun and went well, not to mention only 3 hours and 15 minutes from Indy to Manassas, VA.
After that trip was another one to Michigan to do maintenance work and close the family cabin for the winter. That was a crazy quick trip with plumbing, roofing, and fireplace repairs taking place in 2 days. Not much time for fun and relaxation there...
Another weekend was spent the beginning of October in Lexington, KY visiting my daughter and her family. Unfortunately, this trip was about supporting her as she underwent another scan for thyroid cancer and the ensuing 2nd radiation treatment she required. As of this writing, the oncologist are hopeful this will be the last treatment. Her strength is coming back just in time for the holidays.
Meanwhile, a lot of attention was needed at the home front. Trim painting. Winterizing the yard and equipment, etc. The joys of being a home owner.
Mixed sporadically into my schedule was my on-going commercial pilot training. I finally studied enough to take and pass the written exam. Now if the weather will cooperate, I'll get the flying part of this out of the way in the next month or two. I'll be glad to have this next step in aviation behind me.
There were a number of Saturday's where work overflowed into them rendering them unavailable. The garage was a mess from tools and supplies sitting all over the place from projects both near and far. With our early dip into winter, I wanted to make room for my wife's car in the garage. That would leave one less vehicle to clean snow and frost off in the morning.
So with an open workspace, and my wife taking her mom to a play yesterday, that left a few hours in the afternoon to try and get work on the fastback kick-started.
One thing I did a couple of months ago was upgrade my 25 year old MIG welder. It was a Century/Lincoln unit that had 2 heat settings. It worked well on the heavier sheet metal of my 1929 Model A but has been a challenge on the fastback. I know, I know. I should have done this 5 years ago. With the remaining patching and the dressing of the welds needing to be done, it was time to do something about it.
I happened across a floor demo Hobart 140 Handler for almost 40% off the list price with the 5 year factory warranty. It's basically a Miller unit with the Hobart name. It uses all Miller consumables and has 4 heat settings. I could have bought a Miller 140 that has infinitely adjustable amperage settings, but couldn't justify twice the price for what this one costs. Besides, it's a giant leap forward in a quality MIG machine from what I had. My recommendation for anyone who has to do a serious amount of MIG welding on their Mustang is to pay for a good machine up front. You will not regret it, not to mention having a welder that will last for years.
So with the welder ready to go, I went to work back on the left front fender...the one I thought I was done with. After putting in the lower patch, I was inspecting the repair when I noticed the dreaded sight that has been hounding me throughout this restoration. Wanna guess? Pin holes. Not welding pin holes, but more rust! And the kicker is the rust perforation wasn't more than an inch above the repair I last did. Aaarrrrggghhhh!
So it was on to making another patch. I outlined the area to be removed to make sure I had enough new material in the new patch. I also didn't want to cut across the weld seam from the previous work. Sometimes it's a problem with the difference in weld material versus unwelded steel. At least that's what one of my welding buddies told me.
The cutting wheel made quick work of removing the offending pin hole area...
I used a piece of micro-corrugated and laid it over the opening. Then I pressed it into the opening which left the outline of the cut out area. I used a straight edge to highlight the border...
I cut out the template and was going to use part of the original fender so that I'd have the same contour.
I took the DA sander with a P80 pad and started to strip the old fender. Unfortunately, as the top layer of paint came off, it revealed an uneven layer of bondo. So taking a piece of the fender was not going work.
I dug out a piece of scrap left over from the right toe board repair I made way back when. I scribed a line around the template and cut out the piece with my sheet metal shears.
After taking it to the vice and doing a little massaging to get it to match the fender contour, I cleaned up the edges of the fender and the patch. Using one of my welding clamps, I got it in position ready for tack welding in place.
After getting several tack welds in place, I took the clamp out...
Then the tedious process of multiple tack welds began. I did one tack per side and cooled them off with compressed air. Then it was more tacks and cooling, etc., etc...
I ground down the tacks after 3 groupings. I love the new welder! Night and day difference in ease and quality of the welds. As I neared the end, I marked where I needed to fill in the seam with tacks so that I didn't have any visible pin holes (dang! that again) left...
Then I hit the panel with the DA sander and P80 disc. It's not perfect, but it's not so bad either. I have some hammer and dolly work I can do to level out the surface before applying any Metal-to-Metal filler which will be the next step. But that won't happen until I get the fenders on the body and work all the panels together.
My next project will be to remove all the remaining undercoating from the body, particularly in the rear fender wells. Then it's on to doing the final weld dressing so that I can actually start putting the finishing filler on the firewall and floor. Once that's done, I'm hoping I can get some DP-74 primer on those areas.
I am eating the elephant one bite at a time. I just need to take bigger bites and not so far apart!
Until the next time...