Since my last entry, I placed an order with Eastwood for a new replacement air saw. I've had good luck with them particularly when it comes to any issues with the equipment they sell. Again, my window of time was limited this afternoon, but I wanted to get the toe board/firewall patch bucked up for a good fit to the firewall before trying to trim it to fit. The first task was to measure the offset of the contour in the new part versus the firewall. The vertical line on the left with the arrow pointing to the left was the marking for the material I needed to remove to get the contours close to matching up.

After removing the end piece, the contours were close to being dead-on...

Now I had to deal with the newly created offset in the ribs in the toe board versus the replacement part. This was relatively easy to sort out. The offset was virtually one rib width as marked below...

I needed to add this amount to the right side of the rib in the replacement part to move the rib back in alignment with the existing floor. The vertical line on the left in the photo below was the first cut line...

Now with the cut made, I needed to fabricate the filler piece.

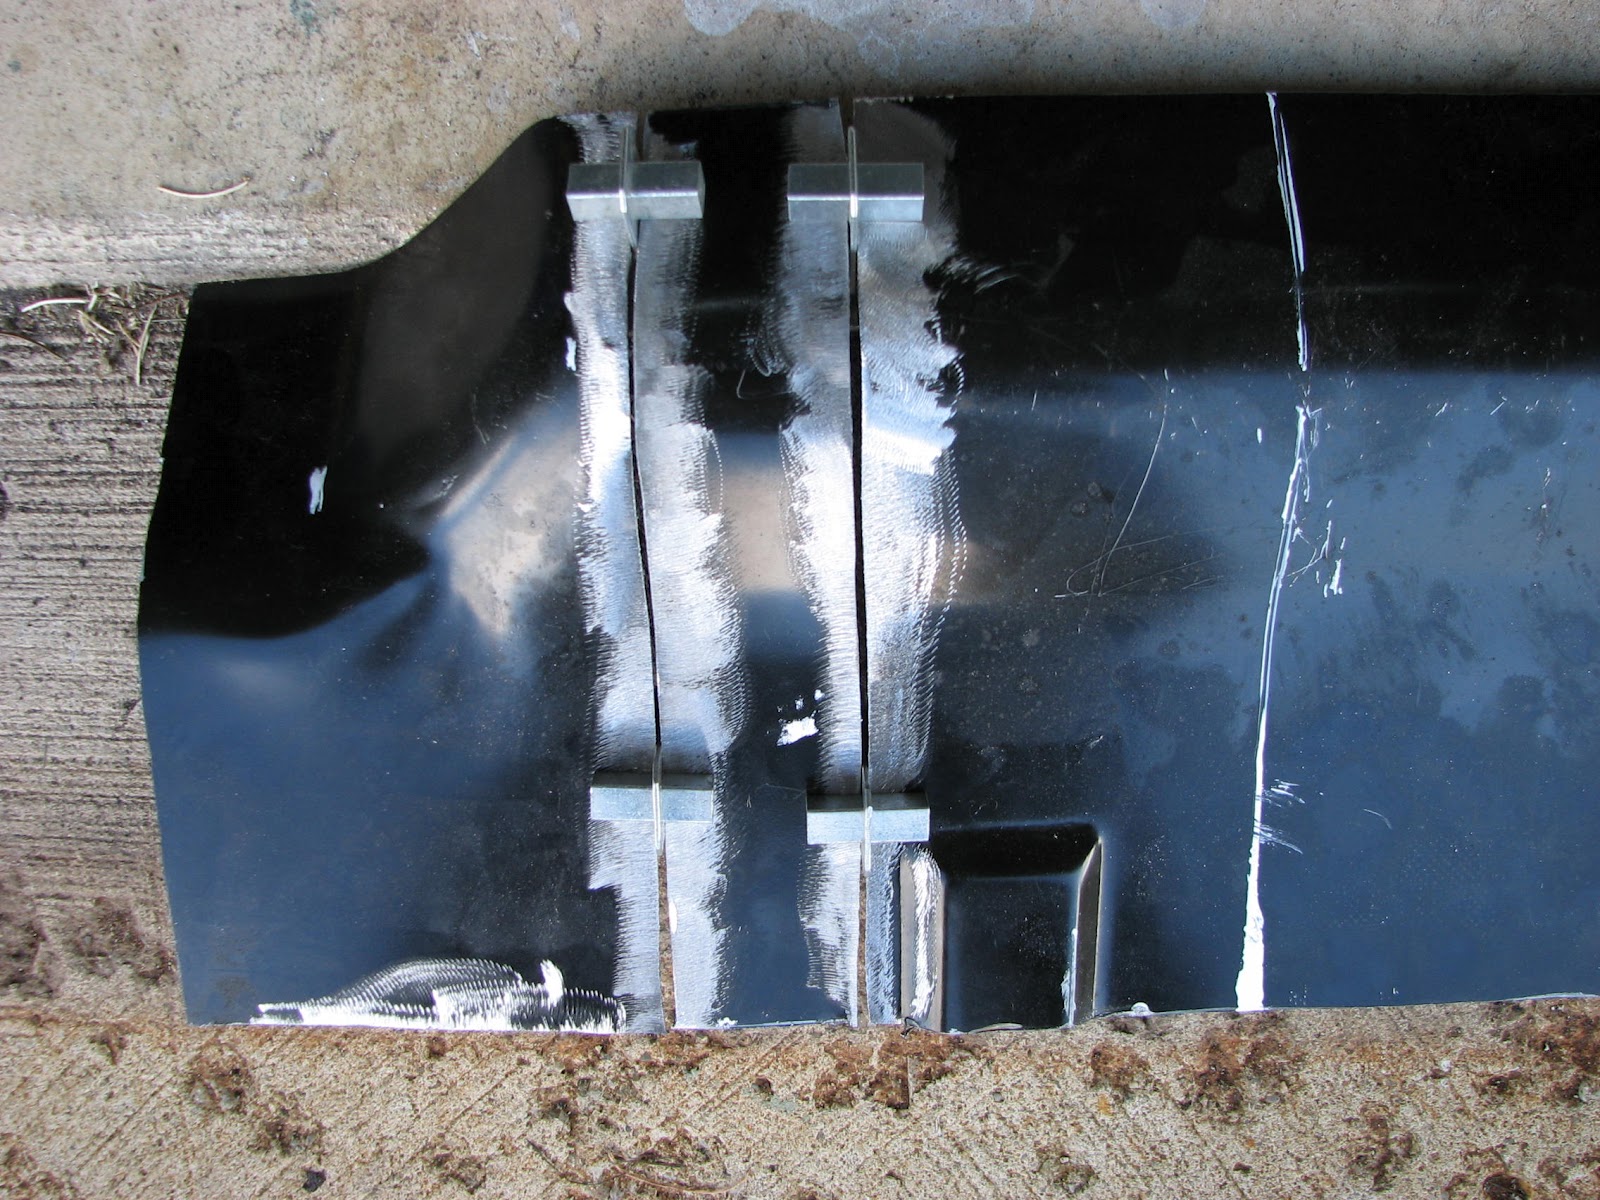
With my measurement of the width I needed, I drew the cut line in the excess end of the replacement part I didn't use for the patch...

After I cut out the part, I used my 2" air sander to smooth up the edges to get a nice fit. Then I used my nice welding clamps to get the fit initially in place.

I did have to do some "massaging" of the filler part with the other two pieces to get a good even surface. Then came the job of doing some initial spot welds...

I removed the clamps and then rechecked the alignment of the joints. But before getting to far ahead, I checked the fit of the replacement part with the firewall. It looked good from the inside....

...and pretty good from the outside. By the time I do the final trim to fit, it should be fairly close, especially after some hammer and dolly work...

The spot welding continued until I was confident that the joints were plum and flat with the mating parts using the body hammer and dolly every half-dozen welds. A quick hit with the 2" air sander and this is the result...

I had to stop here since I had some meat (AKA smoked beef brisket) that needed my attention as well. The metalwork could wait. The brisket couldn't. I'll get back on this and get the joint metal finished later this week, or by the weekend at the latest. Then I can get the final trim and hopefull start the install process and finally, FINALLY get the metal on the floors done. Until then, a man's gotta eat, right? :-)

After removing the end piece, the contours were close to being dead-on...

Now I had to deal with the newly created offset in the ribs in the toe board versus the replacement part. This was relatively easy to sort out. The offset was virtually one rib width as marked below...

I needed to add this amount to the right side of the rib in the replacement part to move the rib back in alignment with the existing floor. The vertical line on the left in the photo below was the first cut line...

Now with the cut made, I needed to fabricate the filler piece.

With my measurement of the width I needed, I drew the cut line in the excess end of the replacement part I didn't use for the patch...

After I cut out the part, I used my 2" air sander to smooth up the edges to get a nice fit. Then I used my nice welding clamps to get the fit initially in place.
I did have to do some "massaging" of the filler part with the other two pieces to get a good even surface. Then came the job of doing some initial spot welds...

I removed the clamps and then rechecked the alignment of the joints. But before getting to far ahead, I checked the fit of the replacement part with the firewall. It looked good from the inside....

...and pretty good from the outside. By the time I do the final trim to fit, it should be fairly close, especially after some hammer and dolly work...

The spot welding continued until I was confident that the joints were plum and flat with the mating parts using the body hammer and dolly every half-dozen welds. A quick hit with the 2" air sander and this is the result...

I had to stop here since I had some meat (AKA smoked beef brisket) that needed my attention as well. The metalwork could wait. The brisket couldn't. I'll get back on this and get the joint metal finished later this week, or by the weekend at the latest. Then I can get the final trim and hopefull start the install process and finally, FINALLY get the metal on the floors done. Until then, a man's gotta eat, right? :-)
Dadgummit Dennis! You keep gettin creative like that and I'm gunna save ALL my patchwork for YOU to do! I'll even let you feed me brisket for dinner while I watch you work! Whadayasay?
ReplyDeleteLOL Sven. Maybe I'll eat brisket while I watch your expert skills at work! Thanks for the comment. BTW...the brisket was very tasty!!! :-)
DeleteBrisket? I think we all need to move to Pittsboro, Indiana! Work on Mustang's and eat Brisket.... :-)
DeleteI know where there's a nice 60' by 90' machine shed available with a concrete floor, 220V, insulated, heat/AC with room for a big smoker out back. I say, let's pool our resources, build Mustangs, and eat brisket, ribs, and pulled pork.
DeleteWell that's looking better Dennis. I don't know what mold they use for making these replacement panels but it must have shrunk over the years :) Else, the original cars were all over the map to start with - which actually wouldn't surprise me.
ReplyDeleteKeep digging!
rj
That is the $64K question RJ. I can't imagine the original being that far off. But then again, if I replaced the entire firewall, I wouldn't be doing any of this. Who knows how good an aftermarket firewall would fit though. It would have issues too.
DeleteYou did great work making that patch fit Dennis. I'm only sorry that you had to do all of that extra work in the first place. Evidently, these repro parts are only intended as a starting point from which to build.
ReplyDeleteThat's so true. I have had to 'massage' every aftermarket part I've purchased. That is why I'm considering cutting the rust out of my rear deck lid and fixing it instead of paying the money for a new one that will require some degree of rework. Thanks for the kind words on the patch. I hope the finished product comes out as well.
Delete