I found myself in a unique position in that I have some vacation left for the year and elected to use it or loose it. Part of it is to go up to west central Michigan over a long weekend to close up the family cabin for the winter. I'm hoping that the weather will hold out so that my wife and I can make a trip down the Pine River that has a fond spot in my heart. That was a date with my wife early in our fledgling relationship. It's been said, if you want to find out if your relationship will last (i.e. marriage) take a canoe trip down the Pine. If you leave the river talking to each other civilly, then you've got a good chance.
So...Monday and Tuesday were days off...sort of. On Monday, it was rather cool in the morning. I dug out the kerosene torpedo heater and fired it up. After about 20 minutes, the garage was comfortable. I needed to finish up the patch panel that I had well on the way to being ready to trim and install. I finished up the weld joints and cleaned them up.

I started the fit up of the now modified aftermarket piece. After the first test fit and marking, I had these trim marks with my white paint pen. When I trimmed it, I left a half-inch of material so that I could slowly get close and not overshoot as I did on the drivers side front floor.
That was all I got done since I had a hospital visit to make and an evening meeting. Yeah...I know. It's supposed to be vacation. Welcome to my world.
So Tuesday started out like Monday. I heated up the garage to take the chill off and then started on working toward getting the patch panel trimmed up to install.

The one step I learned was to make sure the part was attached firmly in position before marking and cutting it. I got out my self-tapping screws and put a couple in so that the section that needed to be flush with the torque box was in full contact...

I marked the part again after I was fairly confident that the fit would be as close as could be and removed it for another trimming session...

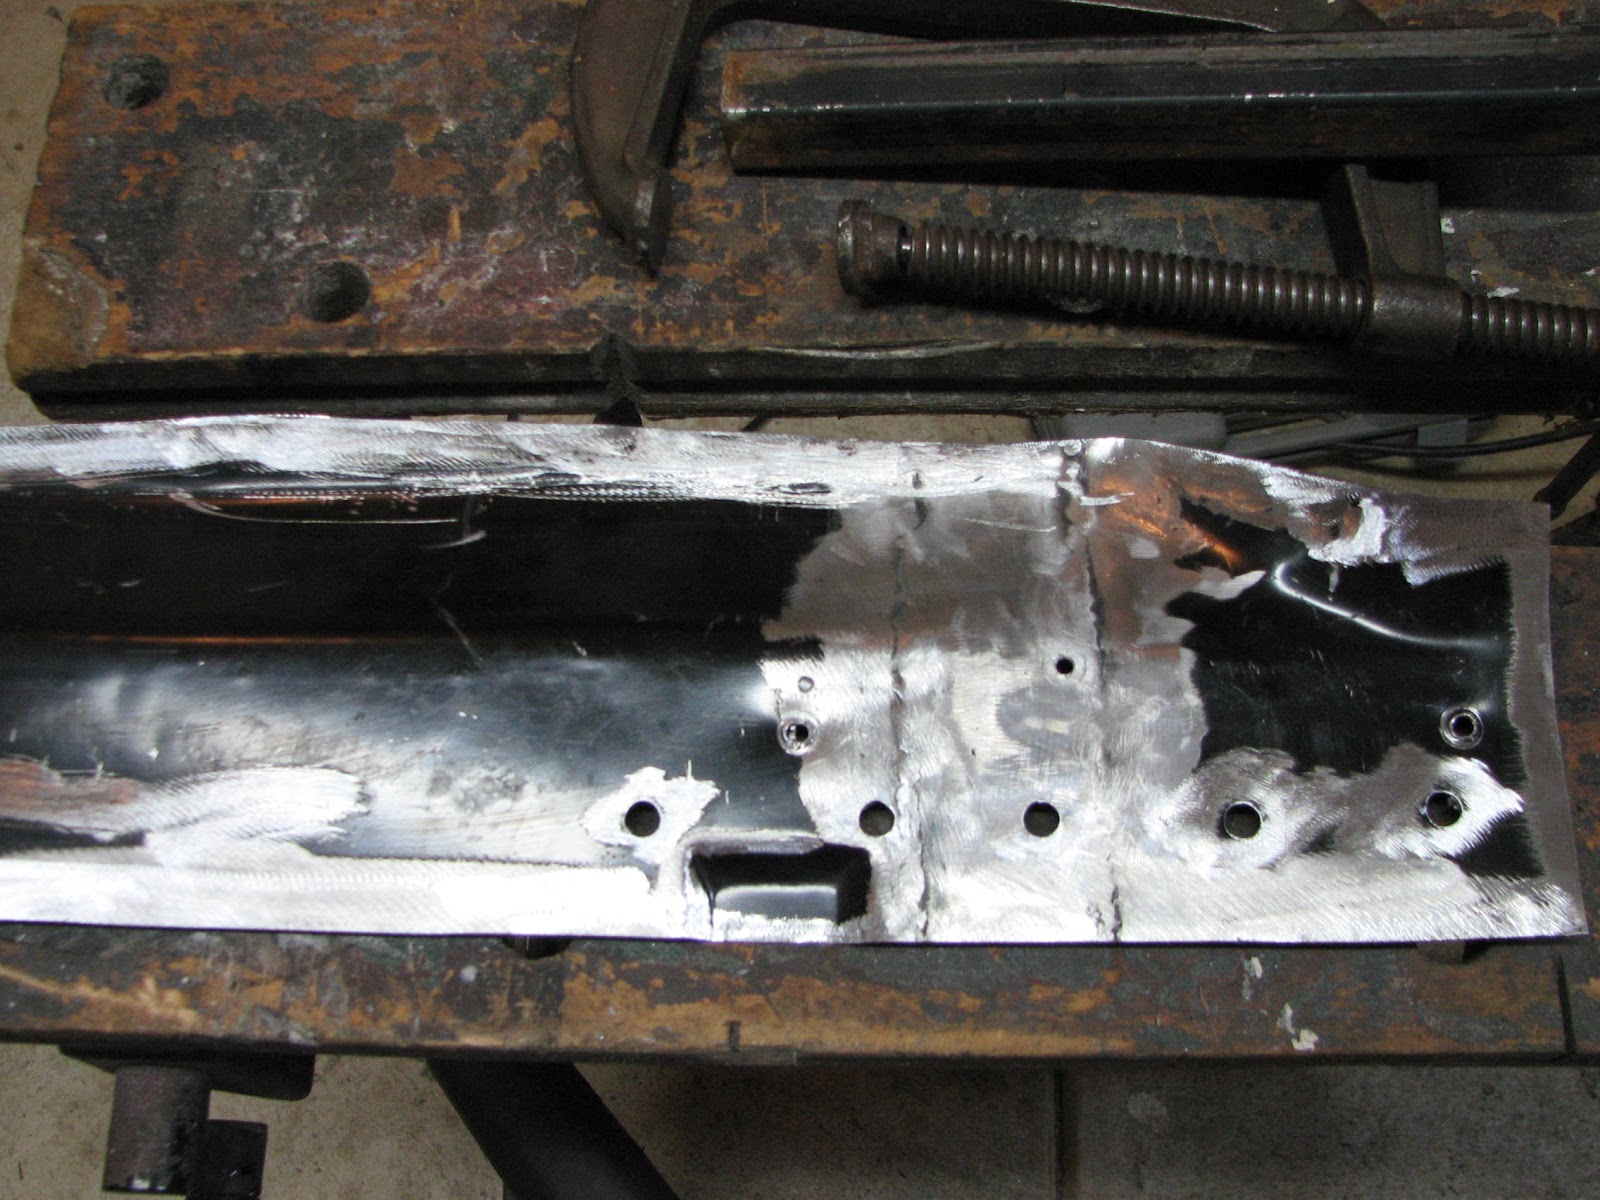
I also decided to go ahead and drill the holes for the plug welds that would attach the part to the torque box in as close to the same location as the original piece I cut / chiseled / ground out...

Another fit up and marking with the paint pen was close enough that I changed to my 4" grinder with a 24 grit flap disc to grind the edges to get them closer without removing too much material. A couple of trial fits and grinding got me very close. Each time, I attached the part with the self-tapping screws. I also had to do some hammer and vice work to get the contour to match the existing floor...

It's almost where it needs to be. The one on-the-fly adjustment that I had to make was to enlarge the holds for the screws that held it in place. Apparently the part had moved while installing the screws initially and the gap was wider at the bottom than at the top. So that gave me some room for adjustment and therefore I didn't trim off too much of the patch panel on one side or the other. Here's the view from outside the right fender apron and firewall area...

...and here it is on the engine compartment side of the rear fender apron. There was still a little work needed on the right-hand side transition from the tow board area to the firewall...

I got the patch piece as close as was possible, at least for my skill level. I started the welding process with the plug welds so that I could remove the attachment screws and knew that it was fitting tight against the torque box. I had to fill the screw holes as well. After that, it was the slow process of spreading the tack welds around to keep the part and firewall from warping. A half-dozen tacks and a followup blast of compressed air kept everything cool. I started on the outside since that was easy to get to, thanks to the rotisserie. Then the areas that were over the torque box had to be done from the inside of the passenger compartment.

Then came the fun job of grinding the welds down with the 4" grinder, and where it was tight, such as the ribs in the floor and the corners, the 2" grinder was the tool of choice, both using 24 grit disc.

This sounds so simple, but the painstaking task of going back and repairing the weld blow-through on the wider gaps and trying to keep the grinding to the weld material and not the patch panel or floor / firewall was time consuming. I still have a half-dozen pinholes to fix and some finished grinding to do. I also have a corner where the firewall and inner fender apron come together that needs a filler piece. The gap was too large and I didn't catch it until after the plug welds were done. Bugger!
However, the repair did go OK. I'll probably add this to the list of areas I'm going to put a skim coat of "Metal-to-Metal" filler, even though this will virtually be invisible after assembly. This is the area outside of the rear fender apron...
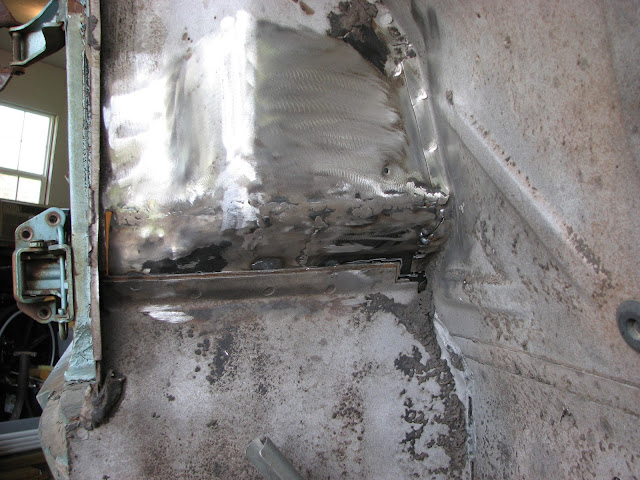
...and this is the area on the inside of the rear fender apron. It's been challenging to get the floor ribs to line up and look respectable. My arsenal of pick body hammers helped, along with the grinders, but there's only so much you can do with aftermarket parts. I think I covered my feelings about that before.

So...Monday and Tuesday were days off...sort of. On Monday, it was rather cool in the morning. I dug out the kerosene torpedo heater and fired it up. After about 20 minutes, the garage was comfortable. I needed to finish up the patch panel that I had well on the way to being ready to trim and install. I finished up the weld joints and cleaned them up.

I started the fit up of the now modified aftermarket piece. After the first test fit and marking, I had these trim marks with my white paint pen. When I trimmed it, I left a half-inch of material so that I could slowly get close and not overshoot as I did on the drivers side front floor.
That was all I got done since I had a hospital visit to make and an evening meeting. Yeah...I know. It's supposed to be vacation. Welcome to my world.
So Tuesday started out like Monday. I heated up the garage to take the chill off and then started on working toward getting the patch panel trimmed up to install.

The one step I learned was to make sure the part was attached firmly in position before marking and cutting it. I got out my self-tapping screws and put a couple in so that the section that needed to be flush with the torque box was in full contact...

I marked the part again after I was fairly confident that the fit would be as close as could be and removed it for another trimming session...

I also decided to go ahead and drill the holes for the plug welds that would attach the part to the torque box in as close to the same location as the original piece I cut / chiseled / ground out...
Another fit up and marking with the paint pen was close enough that I changed to my 4" grinder with a 24 grit flap disc to grind the edges to get them closer without removing too much material. A couple of trial fits and grinding got me very close. Each time, I attached the part with the self-tapping screws. I also had to do some hammer and vice work to get the contour to match the existing floor...

It's almost where it needs to be. The one on-the-fly adjustment that I had to make was to enlarge the holds for the screws that held it in place. Apparently the part had moved while installing the screws initially and the gap was wider at the bottom than at the top. So that gave me some room for adjustment and therefore I didn't trim off too much of the patch panel on one side or the other. Here's the view from outside the right fender apron and firewall area...

...and here it is on the engine compartment side of the rear fender apron. There was still a little work needed on the right-hand side transition from the tow board area to the firewall...

I got the patch piece as close as was possible, at least for my skill level. I started the welding process with the plug welds so that I could remove the attachment screws and knew that it was fitting tight against the torque box. I had to fill the screw holes as well. After that, it was the slow process of spreading the tack welds around to keep the part and firewall from warping. A half-dozen tacks and a followup blast of compressed air kept everything cool. I started on the outside since that was easy to get to, thanks to the rotisserie. Then the areas that were over the torque box had to be done from the inside of the passenger compartment.

Then came the fun job of grinding the welds down with the 4" grinder, and where it was tight, such as the ribs in the floor and the corners, the 2" grinder was the tool of choice, both using 24 grit disc.

This sounds so simple, but the painstaking task of going back and repairing the weld blow-through on the wider gaps and trying to keep the grinding to the weld material and not the patch panel or floor / firewall was time consuming. I still have a half-dozen pinholes to fix and some finished grinding to do. I also have a corner where the firewall and inner fender apron come together that needs a filler piece. The gap was too large and I didn't catch it until after the plug welds were done. Bugger!
However, the repair did go OK. I'll probably add this to the list of areas I'm going to put a skim coat of "Metal-to-Metal" filler, even though this will virtually be invisible after assembly. This is the area outside of the rear fender apron...

...and this is the area on the inside of the rear fender apron. It's been challenging to get the floor ribs to line up and look respectable. My arsenal of pick body hammers helped, along with the grinders, but there's only so much you can do with aftermarket parts. I think I covered my feelings about that before.

All-in-all, this has been at least a 20 hour project if not more starting from cutting out the old rusty area to getting to where it is today. I'm looking at least another hour if not two and then I can call this section finished. I'll probably do some dressing up of the passenger floor joint at the transmission tunnel and rocker panel so that it looks more presentable. Then it's on the the two remaining known rust areas left to repair...the passenger trunk drop off, and the upper-right side trunk corner that has rust damage. Unfortunately, there's not aftermarket part. But after what I've dealt with, I think I'll have no issues making my own patch panel. I can't do any worse considering what I've had to modify to work.
A little sidebar...this installment has taken some more time to write, but I have a good reason. It's the top of the 6th inning and the Tigers are up 2-zip over the Yankees. It would be sweet to see the Tigers sweep the Yankees. Besides, the game is definitely more entertaining than watching the Presidential debate...that's for sure.
Another bite of the elephant Dennis. Good job! If we charged by the hour, I wonder what our total labor charge for these restoration would run? Probably a number we wouldn't want to know :) Keep the pressure on it!
ReplyDeleterj
RJ, Sometimes I do get tired of eating elephant, but it won't get done by sitting there. On the resto costs, it would definitely be out of my budget if a professional Mustang restoration shop did it. But then if someone asked who did the car, I couldn't say, "I did the restoration." ;-)
DeleteWow! Great progress Dennis! Your patch fit a trim methods look like they are working well and the end result of all those hours are WAY better than rusty metal! Keep those updates coming!
ReplyDeleteThanks Sven. I'm hoping to be nearing the end of body rust. By the time I get done, I'll have my skills better honed for the next project. Wait! What did I just say?!?! :-D
DeleteWow, that was one tough patch to fit but you got it done like a pro! Better than a pro, actually, because I doubt that any professional metal shop would have put the detail and care into it that you did. A task to be proud of for sure.
ReplyDeleteThanks Alex. I will say that after working on this patch in particular, the rotisserie was worth every penny! My back has been thanking me today. I'm glad the lion's share of it is done, but I hate chasing pinholes. Oh well...it's all part of the process.
ReplyDeleteFantastic Job Dennis. It's been hard to see my beloved Yankees being swept without even putting up a fight... Maybe next year...
ReplyDeleteThanks for your kind comments. Sorry about the Yankees. I can't imagine them going to the World Series without Derek Jeter tho'.
DeleteGreat Job Dennis. It was hard to see my beloved Yankees being swept by the Tigers. But we will come back stronger next year...hopefully without Alex Rodriguez.
ReplyDelete