At the last exciting episode, I had finished up for the most part the floor to transmission tunnel seam. I had problems with blow / burn through around the emergency brake cable bracket. I was chasing the hole as I attempted to stitch it shut. I couldn't get my copper backup into position due to not having a good method to hold it there, short of asking my wife to lay under the car and hold it there (she was at work). I made the decision to cut out the area of the floor with the blow / burn through. But on the first try, I didn't make the patch big enough thinking that I could weld around the spot weld drill hole. That didn't work at all. I decided to quit before I made things worse....

So I made a bigger cut to remove the entire e-bracket instead of trying to leave it in place. You can see the failed patch attempt, the bigger new hole, and the bracket below...

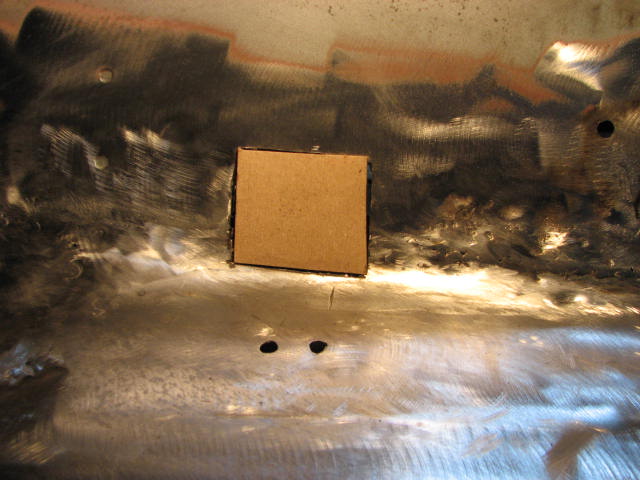
I made a patch using a cardboard template and then transferring it to a piece of scrap floor pan metal I'd cut away previously while trimming up the floor pan....

After cutting out the patch and doing the trimming and forming to fit the hole, I welded a scrap to it so I could hold it into position...

This was working much better. I started the tacking process and then removed the "helper" piece of metal...

I continued to do the typical spot--cool--grind routine until the repaired area looked like this...

It didn't look too bad. But work came to a screeching halt because the air regulator in my compressed air line decided to go on the fritz and I couldn't control the pressure for my air tools. Bugger. Then the torpedo heater started to spit and sputter as it does just before it runs out of K-1. I shut it down and when to add some more Kerosene, but there was only a gallon in the container. Double bugger. So that ended Friday's work, which took a couple of hours by the time I got set up with heat and everything ready to start work... and then the work itself... and then the clean-up, especially since I promised to take my wife out to dinner after a challenging week at work for both of us.
Saturday morning brought a nice coating of about 1" of sleet with another 1" to 2" of snow on top of that. I roll out of the drive at 6:30 AM and head to Starbucks and then the church to pick up where I left off at Noon on Friday. After my meeting was over I stopped and filled up my 5 gallon kerosene container. Then I headed back home to deal with the air regulator. I took it off the air line and headed to Lowes (it was a Kobalt brand regulator) where I bought it. They didn't have one in stock, but the store 20 minutes away had 3 in stock. So off to the other Lowes I went. With a new regulator in hand (they exchanged it even with no receipt!) I headed home. But by this time, it was 5:30 PM and I was hungry and tired. So I called it a day.
Now it's Sunday afternoon. After a couple of visits to families after church, I got home around 3 PM. The heater was running and I was ready to go to work. But then I get a call from one of the church members who now lives in Atlanta, but his daughter still lives in the area. She went to a national parts store (which shall remain nameless) to get a headlight replaced in her Kia Rondo. They couldn't do it. So he asked me if I could help. She came over and, thanks to a really dumb design, it took about 20 minutes to troubleshoot what said parts store had messed up and find out what bulb she needed. She went and got the correct bulb, and then another 20 minutes to get it installed. With all headlights now working, I sent her on her way. So I got back to work on the fastback around 4 PM.
The work left on the floor amounted to finishing up some unfinished tacks along the transmission tunnel and the seam at the rear of the floor pan. Here is the finished result...

I know it's not the prettiest metal finishing job, but the seat riser flange is going to cover it up. Then I cleaned up the surface of the floor with a stripping pad on my 4" grinder, did some more metal filling and grinding, and got to the point where I've done about all I can on the floor from the inside of the car. So here is what it looks like now...


I'm going to wait to put the seat riser in until I finish up the floors on the underside. So now I'm ready to move to the next big step...getting it ready for the rotisserie. I have to put it on jack stands and pull the tires. Then take the front and rear suspension off along with the passenger-side door. It's been a long, long time coming to get to this point. Hopefully, once I get it on the rotisserie, I can make some good progress and get the underside metal work done once and for all. I better stop and pick up a case of "PB Rust Blaster" and start soaking all of those suspension nuts and bolts for the next week or so. Maybe that will help disassembly go easier, but as history has proven, I'm not counting on it.
"I know it's not the prettiest metal finishing job, but the seat riser flange is going to cover it up"
ReplyDeleteDon't worry about it. It's a good strong floor and is better than a "flange overlap" type of install. Also, it looks 10000000x better than the old rusty floor! Nice work!
I did the "flange overlap" on the passenger side and will remedy that when I get the Mustang on the rotisserie so that both sides look the same. I'll probably used the Everlast "metal-to-metal" filler to feather the seams as Sven did on his Boss firewall and tunnel. I like the butt / flush fit of the floor even with all the work involved. And you're right. It looks order of magnitude better than the old rusty floor.
DeleteGood luck on the suspension removal Dennis. Hopefully you won't have to fight the front eye bolts on the rear suspension too much. Those things are almost always frozen inside the bushing. Mine hung on like grim death despite PB blaster, air socket wrench, air chisel and finally the blue wrench. Ended up having to cut both sides of the bolt off with my DeWalt grinder and cut-off wheel - or as Sven prefers - "the Spinning Wheel of Death"!
ReplyDeleteEven once I got the springs out on the ground, I still could not beat the remains of the bolts out of the bushings. Even though I was replacing the springs entirely, it was just the principle of the thing that I was going to get the bolts out of the holes. Both springs are now in the scrap pile at work with the bolts still in the holes :/ Springs 2 - RJ 0.
I have a feeling removing some of the suspension will be a combo of "wheel of death" and "blue wrench". I've never removed rear leaf springs on any vehicle I've owned without a torch. I also remember a blog somewhere that posted how to remove front suspension and steering components without the "pickle fork" which can damage the power steering links. I'm going to look for that one.
Delete