Saturday has been a busy day. But it seems like that's been the norm lately. My wife is at a retreat this weekend and so I'm a single guy with no real home commitments. However, that didn't mean I could ditch my other obligations including the open house for our church's early childhood center. Then it was decision time for the rest of the afternoon. The weather Saturday was really nice here...light breeze. Sunny. Mild for this time of the year. And not a cloud in the sky. It was calling me to bore holes in it. And the airplane was available. What to do? Fly or Mustang? Fly....or Mustang? The Mustang won. I went home and worked on the fastback. One has to keep priorities in line, right? There will be another day to fly. Plus my wife wants to go with me on my next $100 hamburger run.
From my last installment, it was apparent that this part of the body was going to provide a large challenge in getting it straight. I do have a section of rust repair left to do, but determined that it would be best to get the panel in shape first then do the rust repair.
To do the metal bumping required a full arsenal of body tools, especially hammers and dollies. Here is most of my collection...


After a few minutes of sanding with 80 grit on a long sanding block, the high and low spots were quite evident, particularly the larger areas and the creases that seemed to cover most of the panel. It does not look pretty...

To get an idea of where the creases were, I used my paint pen and let it follow the valleys of the creases. The "dimpled" dents became apparent from the sanding. There were quite a number of them that will make this an interesting exercise in body work.

To aid in the locating of the dents for the dolly and hammer placement, I cleaned up the inside of the quarter to make that task easier. High spots were shiny and the low spots darker. Holy Mackerel! what am I thinking!?!?!? I must be a glutton for punishment to do this work.

There are two larger round dents right over the top of the wheel well...

I started with these two dents. The reason for starting here were twofold. The first is they are the easier dents to remove as they are symmetrical. The second is that they were the farthest away and would allow me to work toward the more challenging part of the quarter panel.
I was using a couple of techniques that you may or may not be familiar with using body hammers and dollies. First off, the dolly is used on one side of the dent with the hammer applied to the opposite side. The metal for all purposes is sandwiched between the hammer and dolly. How it's sandwiched is the key to metal bumping.
The first is the "dolly off" method. This is when the dolly is pushed against the low side of the dent that you want to bring into alignment with the surface while at the same time hammering lightly around the perimeter. What this does is return the metal close to its original state. Hold the hammer up close to the head. The technique to use is light rapid hammer blows, almost more of a tapping, in a circular motion around the dent. Make sure the hammer hits are flush to the metal and not at an angle. Otherwise you'll introduce more small dimples. Don't be in a hurry, or use a lot of force, and check your progress often. In this case, the hammering is done around the outline of the dent where the sanding marks stopped in the primer indicating the low side. I worked in a circular pattern pushing on the dolly while at the same time slowly working toward the center of the dent on the opposite side with the hammer. The result when done judiciously is usually pretty good, at least on the gauge of the panels on the Mustang and gets the body panel back to the original shape.
The second method is the "dolly on" method. This flattens the sheet metal, but also thins it and causes it to stretch sort of like rolling out dough with a rolling pin. This is when a shrinking hammer comes in handy. This is the Snap-On hammer I picked up a while ago. The "knurls" in the head actually gather the metal together shrinking it. Dollies are also available like this.

Whatever method you use, it is a TIME CONSUMING and SLOW process. Did I say you need to be patient? This is what the panel looked like after about 45 minutes.

The other part of the process I mentioned is to use a flat sanding board lightly over the area you're repairing on a frequent basis. Notice that the areas where the primer remained in the low spots are starting to get smaller. Keep working the dent in the hammer off dolly method. Eventually you will get close to the center of the dent.

As the process continues, the area with the primer will get smaller and smaller until there is a very small or hardly visible area.

Eventually, the dent will almost disappear. But even at this stage, a high build primer will fill the remainder of the dent particularly when it gets down to about a 1/4" in diameter. The trick is to not overwork the area and go too far. Otherwise, you will end up using the shrinking hammer with the "dolly on" method. This is what the finished product looks like...

Here's a trick I used since I couldn't get behind the dent furthest toward the front of the quarter panel with a dolly or even a crow bar (yes you heard that right!) So I broke out the stud gun. I was somewhat concerned about using it considering the problems I had previously. But then when I took a look at the end of the gun, the grounding ring was pretty nasty. I took the tip out and used a fine tooth file and dressed it up. Volia! Success. (Lesson learned: be sure your welding ground is clean!)
I cleaned the primer from the dent and then put a stud in the center of it. This is a variation on the dolly off dent removal. The stud takes the place of the dolly behind the dent...
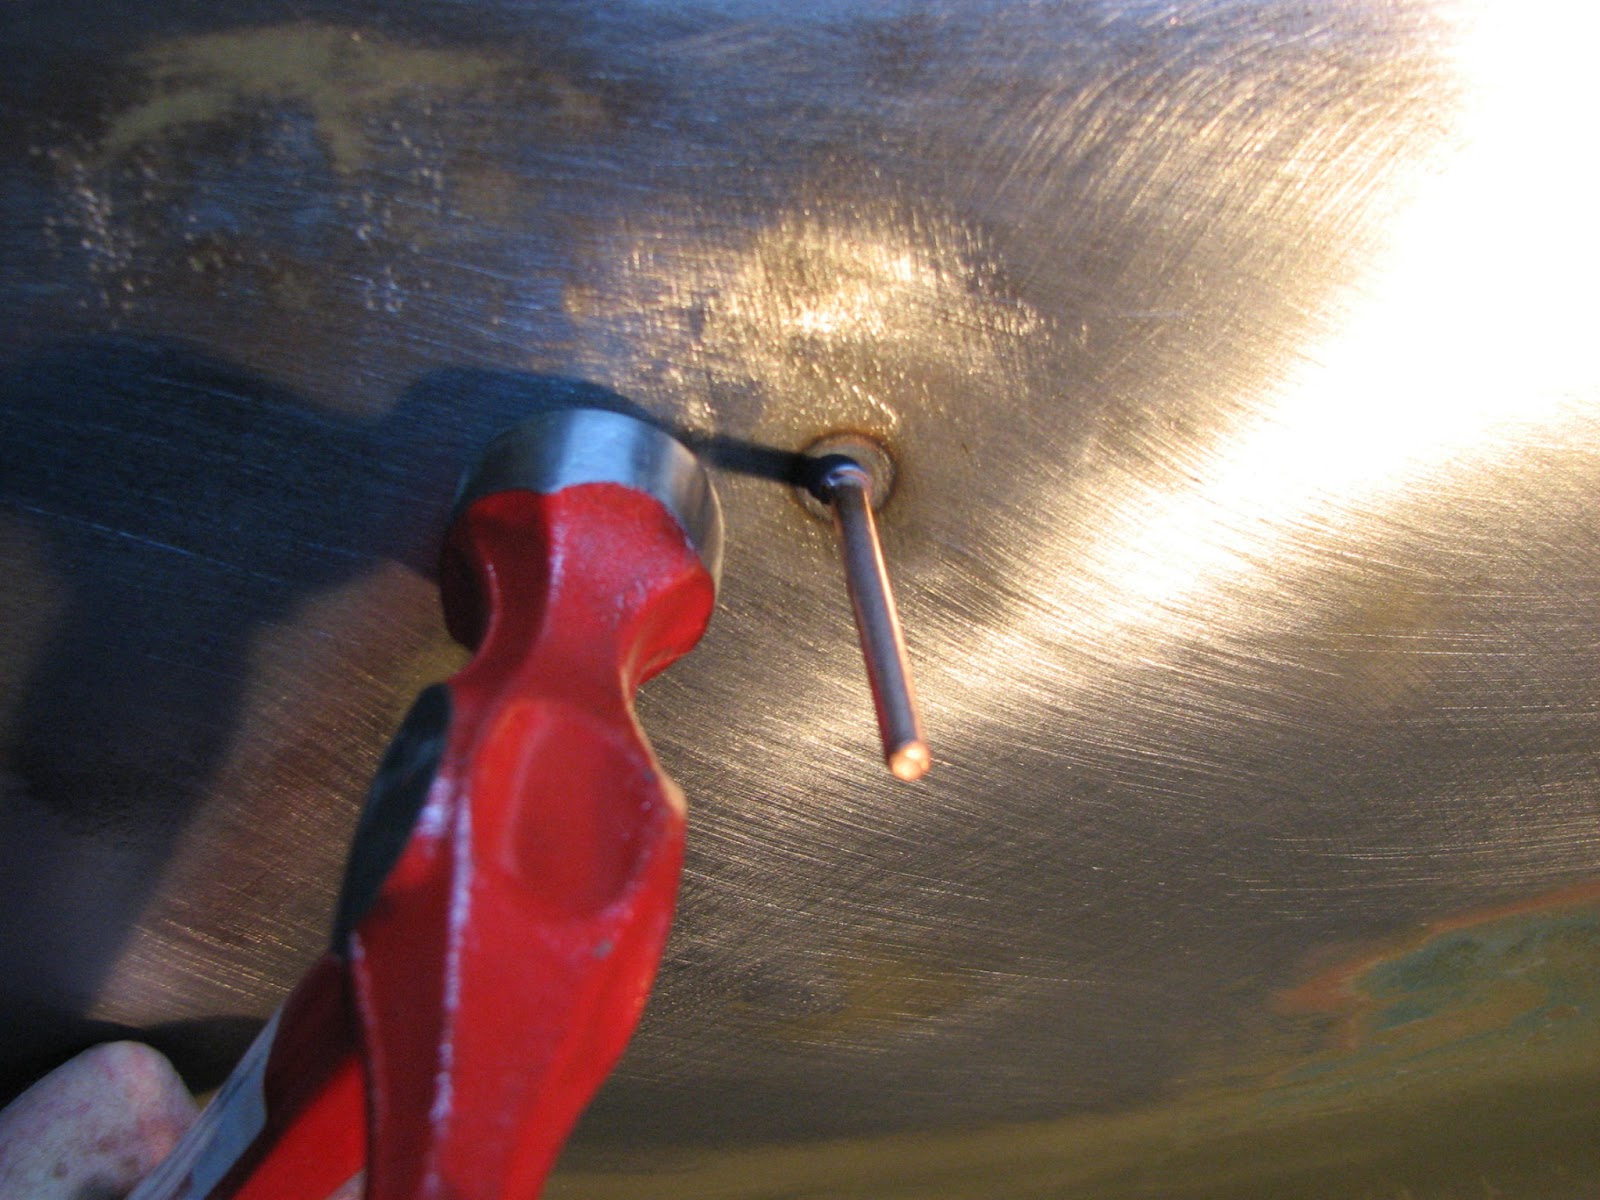
The stud puller is attached but the slide is not used. Instead, pull steadily on the slide hammer while hammering around the stud. When you can determine that the center is even with the rest of the panel, such as using a straight edge next to the stud, you're done. Use a cutoff wheel to remove the stud. Do not...DO NOT try and bend it back and forth. Otherwise you'll end up with a hole where the end of the stud was.

I was out of primer and thought I'd use a can of guide coat since that's what I was using the primer for. Amazing what you can find that you bought before and forgot you bought it when looking for something else.

So I laid down a couple of coats and waited for it to dry...

While I was waiting for the guide coat to dry, I decided to try my newly purchased nylon cone brush on the roof to see how good it would work on cleaning up the "patina" on it. This is the front part of the passenger side roof....

...And this is the after on the rear section. It does a pretty nice job, even if I say so myself...

OK. So the guide coat was dry...

This is after making a pass with my sanding board with 80 grit...

I kept moving the direction of the repair work from over the wheel well toward the rear of the quarter and moving down simultaneously. Think of it as working the panel in a pattern in the opposite direction as if dropping a rock in a pond...in a wave pattern since most damage travels through a panel in a similar matter. You're following the wave pattern but backwards. Here's the panel after working across the top and moving down into the middle of the quarter panel...

The size of the creases and dimples have been dramatically reduced. There is progress, but the metal was starting to bunch up with high spots. That needs to be fixed.
I could used the shrinking hammer but that would take tons of time. So... I've been saving the best for last. It was time to break out the heavy artillery...

Meet the shrinking disc. This is a 9" diameter stainless steel disc with a slightly upward curve at the circumference somewhat like a plate. It acts very similar to using a torch except the heat is only applied to the high spot that you're trying to shrink and doesn't affect a wider area like a torch would...

For a treat, here's a short video of how this works.
After getting a couple of the high spots back in place, I worked some more on the little blemishes--i.e. the little dents and creases. I will tell you this; God bless the person who came up with the auto rotisserie. I can't imagine working in some of the physical positions to do this work without being able to rotate the body for the best leverage. So after almost 4 hours of hammer and dolly work, this is the progress...

This is looking down the quarter panel line. It's looking pretty good. If I keep this up, I may get by without any filler and use just a high-build primer.

I stopped here because I literally ran out of strength in my arms and shoulders after 4 hours. I didn't even attempt to pick up the garage. That can be done later...or I can just leave it until I get to continue this lovely process.

Until the next time......
Excellent documentation of the panel bumping process! Aren't shrinking discs nifty? I wouldn't even dream of using my torch again for this work once I discovered the shrinking disc. One thing I noticed is you see a few sparks off the disc on the longer passes. Try applying a small touch of bar soap to the surface of the disc and this will help keep the micro-galling from happening and no more sparks. Keep the updates coming!
ReplyDeleteThanks for the comments Sven. I love the control of the shrinking disc. It puts the heat exactly where you need it. On the spark front, the water I used for quenching did have some dish soap in it, but not enough to stop the sparking. I'll give the bar soap a try on the next round.
DeleteThat quarter is looking great Dennis. Most of my metal is involving replacement versus reshaping due to the amount of rust. I don't think I will ever need to reach the level of mastery that you have been showing us here. Keep it coming.
ReplyDeleteThanks Grant. I don't know if I would call it "mastery" but more necessity. I hated the though of cutting the quarter panel off when it's original to the car. The next couple of sessions will really determine how much of the quarter I can salvage.
DeleteExcellent tutorial on the basics of panel bumping Dennis. I've learned a LOT from this post. Just about anybody can replace a panel but fixing it takes real knowledge, skill, and experience as you have shown. One of the things I've learned is that I need more tools!
ReplyDeleteThanks Alex. I didn't learn to do this without a LOT of practice that included some pretty big screw ups. Even so, I still have to figure out how to make adjustments as I go. This quarter has posed its own challenges, but I'm hoping for the best as I work to finish it.
DeleteTHAT is one impressive post Dennis! The height of craftsmanship!!!. The TV restoration guys would have slathered an inch of bondo onto that thing and moved on - or worse - cut it out entirely and welded some beautiful example of Chinese reproduction in its place.
ReplyDeleteWe all know these things are inanimate objects. But they become animated objects through our own force of will. Ultimately a physical statement of who we are as human beings. Great post!!!
rj
You are way too generous with your words. I still do not know if I will get this panel "flat" to my expectation. But it will be much better than either of the two options you mentioned. I do have a new body tool on order that I need to add to my stash if I'm going to have a chance at getting all the dimples and pimples out. Hopefully, I'll be including this process in my next post.
DeleteGreat Article… I love to read your articles because your writing style is too good, its is very very helpful for all of us and I never get bored while reading your article because, they are becomes a more and more interesting from the starting lines until the end.
ReplyDeleteJeep Frame Welding